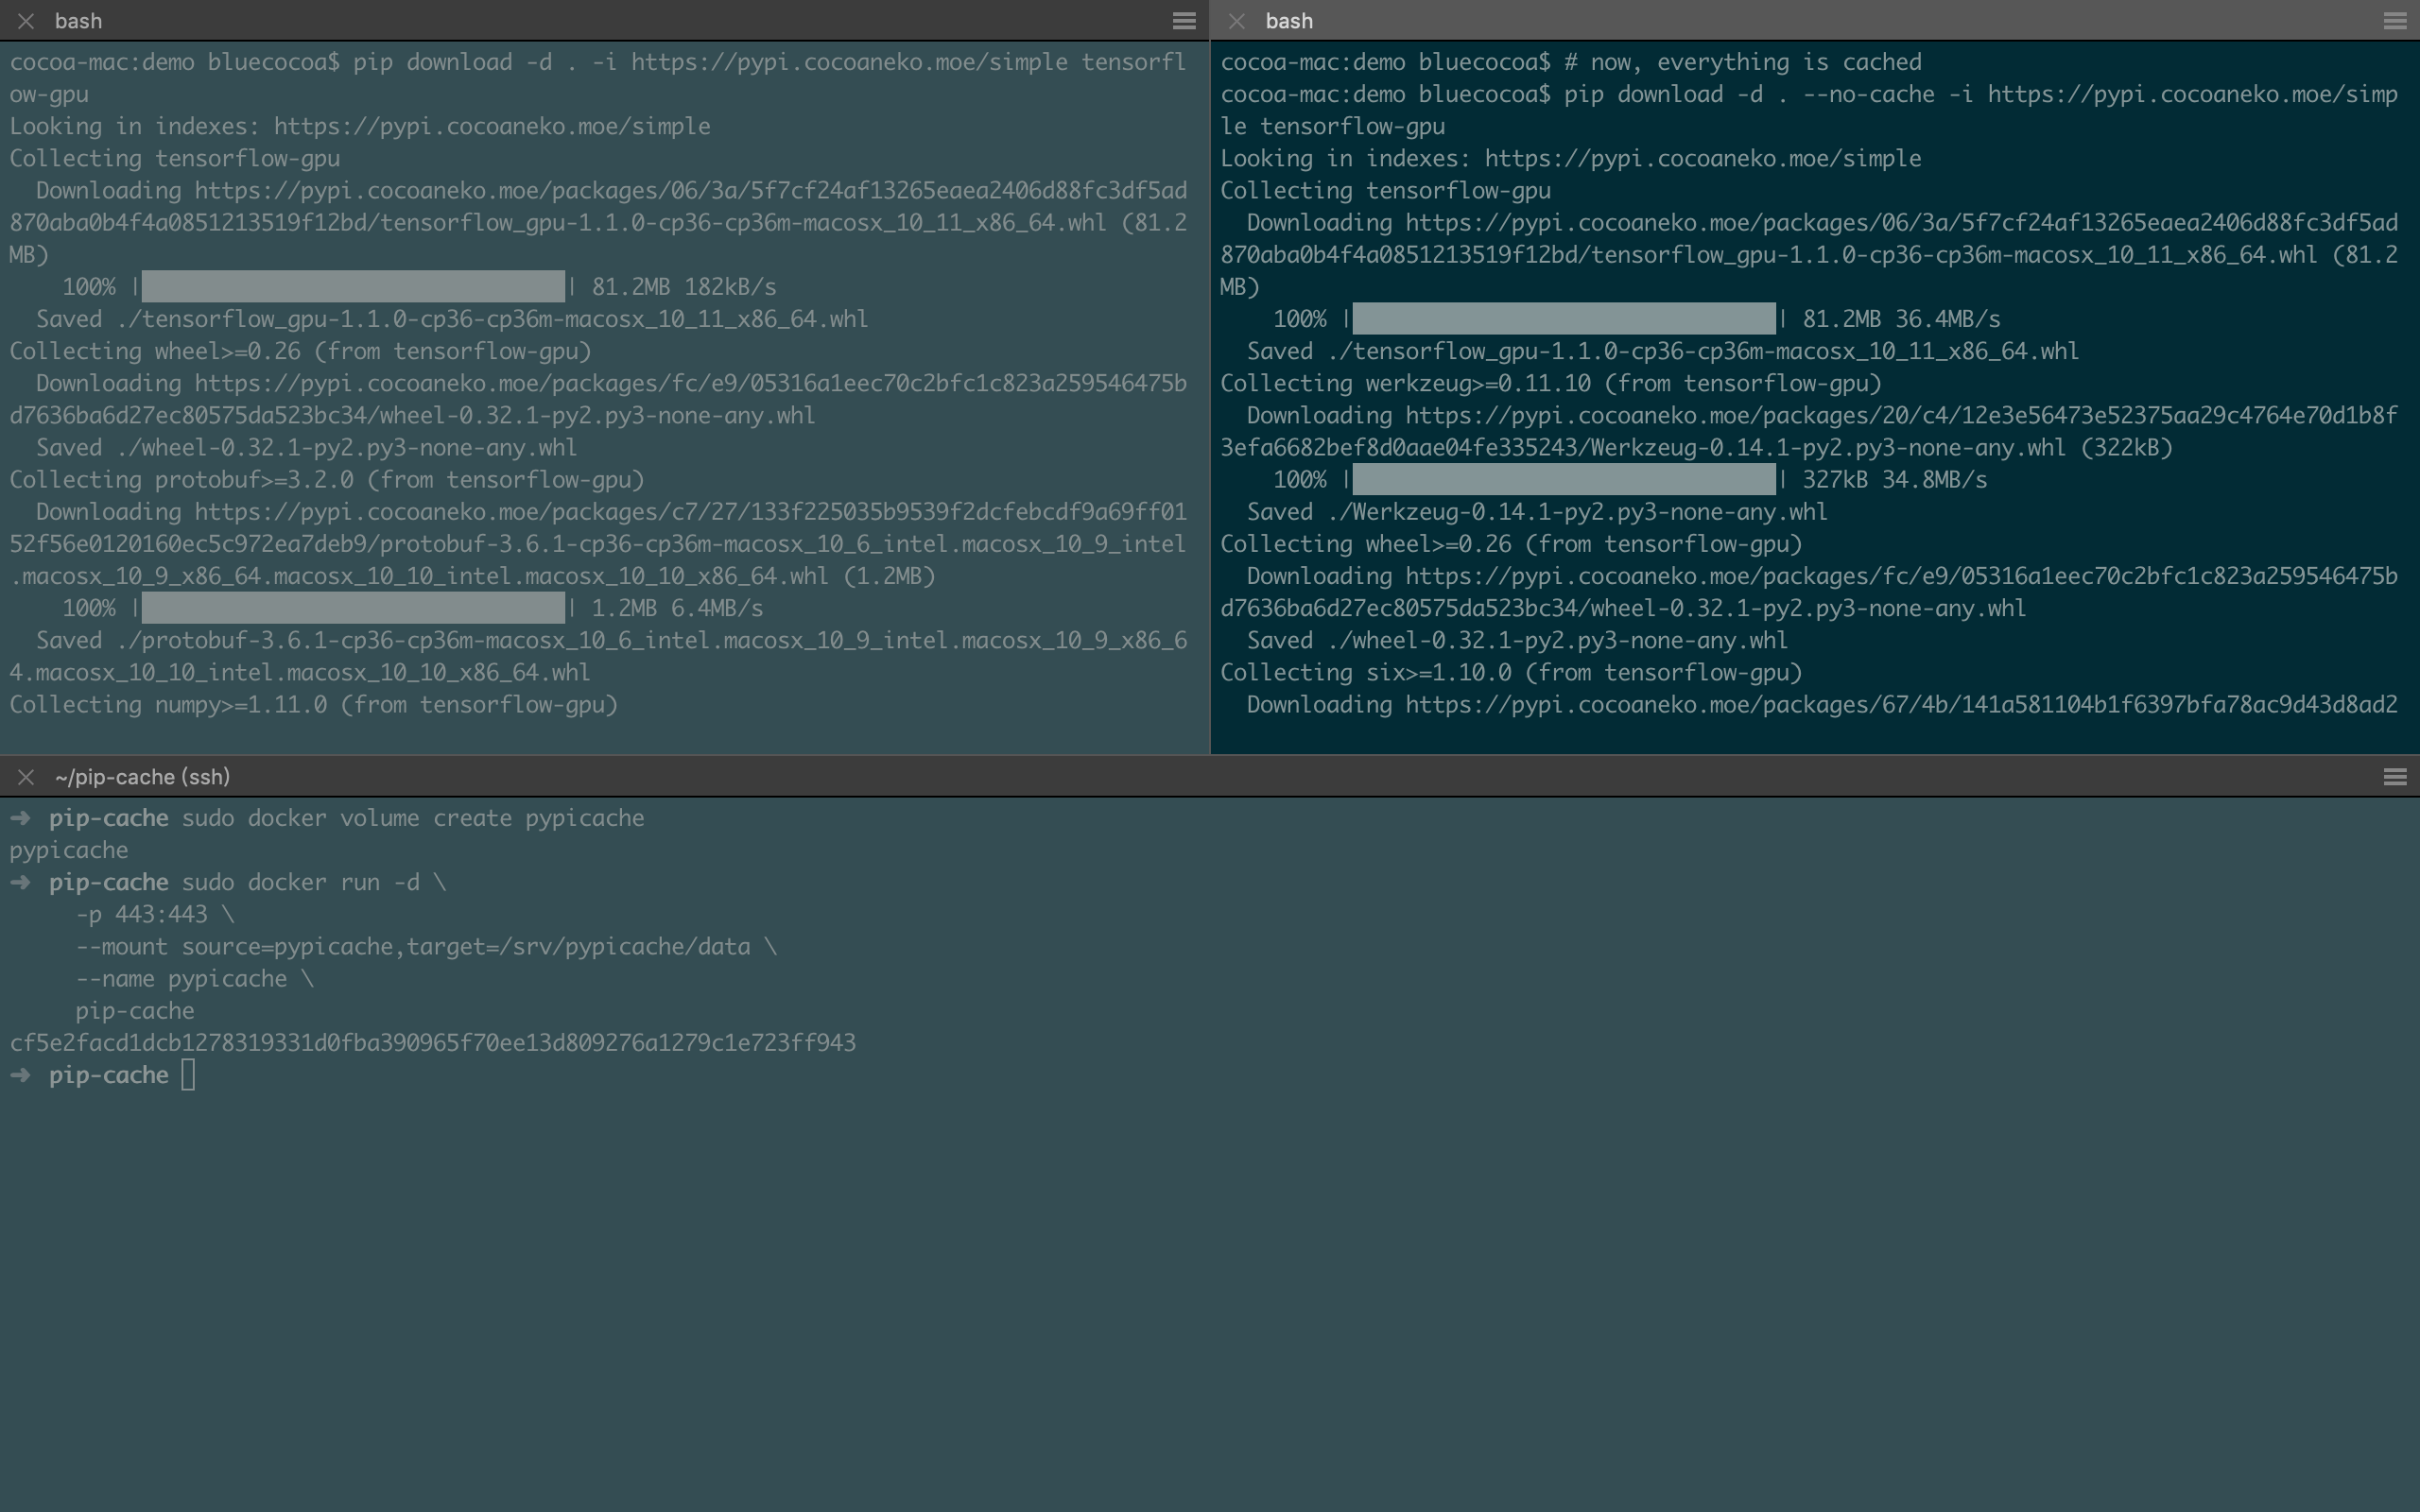
- 当公司/局域网里有多人都使用 Python 开发,并且几乎都会用到 pip 来部署环境时,虽然已经有各种镜像源了,但是下载仍受限于与外网的宽带速度,并且同样的包可能被多人下载了多次,在包较大时,重复花的时间并不值
- 当你使用 Docker 来构建不同的 Python 应用/环境时,在测试 Dockerfile 时可能需要不断的删掉之前 build 的版本,从头开始 build 时,pip 下载与上面面临同样的问题——重复消耗不必要的时间
其一解决方案是公司/局域网内部搞一个 PyPi 的镜像源,实际上维护一个完整的镜像源相当麻烦,占用的储存空间太大,在公司/局域网的情况下,大家开发的东西、使用的技术栈相对比较固定,这就导致完整的镜像源里会有很多包其实几乎没人用。
其二的解决方案可以是预先构建好一个或多个 Docker 镜像,其中包含大家都会用到的包,剩余的一些包则在使用时才被少数需要的人安装。这种方案的缺点则是目前 Docker 服务 + 多用户方案在重启之后会丢掉已经配置过的环境,重启之后依旧需要从镜像源下载包。
那么这里相对一劳永逸的方案则是搭建一个本地的按需下载的 PyPi 镜像源,其原理则是在镜像源与公司/局域网内增加了一个高速缓存,并且由于 PyPi 已经提交分发的whl或者tar.gz是不会变的,因此不用顾虑缓存时间的设置。
最后就像这样~ 182KB/s VS. 36.4MB/s
(cache server为千兆有线链接,MacBook为802.11 AC,测试时链接速度585Mbps)

代码放在了pip-cache~下面是详细的介绍/
由于静态文件占绝大多数,因此选择了 nginx 来为服务器。nginx 的服务设置很简单,其中 /etc/nginx/nginx.conf 做了一些调整,这里我是采用了 Docker 的方式,因此 nginx 的运行用户设置为了 root。如果在物理机上使用这套方案,则可保持运行用户为 www-data,以较低权限运行。
主要调整了 worker_connections 的数量,然后使用了 epoll 模型,在可能的高并发环境下也有不错的性能。
user root;
worker_processes auto;
pid /run/nginx.pid;
include /etc/nginx/modules-enabled/*.conf;

events {
    worker_connections 4096;
    multi_accept on;
    use epoll;
}

http {
    sendfile on;
    tcp_nopush on;
    tcp_nodelay on;
    keepalive_timeout 65;
    types_hash_max_size 2048;

    include /etc/nginx/mime.types;
    default_type application/octet-stream;

    ssl_protocols TLSv1 TLSv1.1 TLSv1.2; # Dropping SSLv3, ref: POODLE
    ssl_prefer_server_ciphers on;

    access_log /var/log/nginx/access.log;
    error_log /var/log/nginx/error.log;

    gzip on;

    include /etc/nginx/sites-enabled/*;
}
接下来是具体的服务配置文件,/etc/nginx/sites-available/default。这里我“给了” pypi.cocoaneko.moe 这个域名给这个服务——实际上是用 certbot 用 DNS 验证的方式申请了一下 SSL 证书,没有真的在 DNS 上将域名指向到具体的 IP,在局域网中,需要使用这个服务的人则可以修改一下 /etc/hosts,比如这个服务跑在 10.0.1.233 上,那么就加一行
# 在 /etc/hosts 中增加一行
10.0.1.233 pypi.cocoaneko.moe
对于 Docker 集群来说也可以用类似的方法。如果是用 Docker Compose 构建的那就更方便了(这个稍后与 Dockerfile 一起说)
nginx 的服务配置文件 /etc/nginx/sites-available/default 如下所示~申请好的 SSL 证书我放在了 /cert 下,物理机则只需保证 nginx 能找到就行
这里是针对国内的清华大学的 PyPi 源 (https://pypi.tuna.tsinghua.edu.cn/simple) 的配置。清华大学 PyPi 源的包都是统一放在 https://pypi.tuna.tsinghua.edu.cn/packages 目录下的。
因此这里我们让 nginx 缓存所有对 packages 目录的结果到 /srv/pypicache/data。那么对于这个 /srv/pypicache/data 的持久化,物理机上保证 nginx 对这个缓存目录有读写权限即可。在我实际的 Docker 配置中,我创建了一个名为 pypicache 的 volume,并将这个 volume 挂载到了 /srv/pypicache/data 上。
# 创建了一个名为 pypicache 的 volume
sudo docker volume create pypicache
而对 simple 目录的请求则每次都 forward 给清华大学,这样就可以保证我们总能拿到最新的 index。在下面的配置文件中,如果不使用清华大学的 PyPi 源的话,则可以对应修改高亮的部分。SSL 证书如果放在其他地方也需要修改~以及使用的域名,我自己的是 pypi.cocoaneko.moe,在下面也需要修改~
log_format pypicache-default '\$remote_addr - \$remote_user [\$time_local] "\$request" \$status \$body_bytes_sent "\$http_referer" "\$http_user_agent" DEFAULT';
log_format pypicache-other '\$remote_addr - \$remote_user [\$time_local] "\$request" \$status \$body_bytes_sent "\$http_referer" "\$http_user_agent" OTHER';
log_format pypicache-local '\$remote_addr - \$remote_user [\$time_local] "\$request" \$status \$body_bytes_sent "\$http_referer" "\$http_user_agent" LOCAL';
log_format pypicache-remote '\$remote_addr - \$remote_user [\$time_local] "\$request" \$status \$body_bytes_sent "\$http_referer" "\$http_user_agent" REMOTE';

server {
    listen 443 ssl default_server;
    listen [::]:443 ssl default_server;

    ssl on;
    ssl_certificate /cert/pypi.crt;
    ssl_certificate_key /cert/pypi.key;
    ssl_session_cache shared:SSL:10m;

    server_name pypi.cocoaneko.moe;
    root /srv/pypicache/data;
    index index.html index.htm;

    access_log /srv/pypicache/logs/access.log pypicache-default;
    error_log /srv/pypicache/logs/error.log;

    location /packages/ {
        try_files $uri @mirror;
        access_log /srv/pypicache/logs/access.log pypicache-local;
    }

    location / {
        proxy_next_upstream error timeout http_404;
        proxy_pass https://pypi.tuna.tsinghua.edu.cn;
        proxy_redirect off;
        proxy_set_header Host 'pypi.tuna.tsinghua.edu.cn';
        access_log /srv/pypicache/logs/access.log pypicache-other;
    }

    location @mirror {
        proxy_store on;
        proxy_store_access user:rw group:rw all:r;
        proxy_next_upstream error timeout http_404;
        proxy_pass https://pypi.tuna.tsinghua.edu.cn/$request_uri;
        proxy_redirect off;
        proxy_set_header Host 'pypi.tuna.tsinghua.edu.cn';
        access_log /srv/pypicache/logs/access.log pypicache-remote;
    }
}
物理机的话,配置则到这里就结束了,让 nginx 跑起来即可
sudo nginx -t
sudo service nginx restart
使用 Docker 的话,则需要编辑一下 Dockerfile,还有将刚才的配置文件与 SSL 证书组织好
文件的组织如下~
.
|-- Dockerfile                   # 用于 Docker 构建
`-- overlay
    |-- cert                     # SSL 证书
    |   |-- pypi.crt             # SSL certificate, full chain
    |   `-- pypi.key             # SSL 私钥
    `-- etc
        `-- nginx                # nginx 配置目录
            |-- nginx.conf       # nginx 全局设置
            `-- sites-available
                `-- default      # 我们构建的镜像服务的设置
Dockerfile 文件如下
# Copyright (c) {Iori,Ryza} Oikawa @ Meowtain
# Distributed under the terms of the Modified BSD License.

FROM nginx

LABEL maintainer="RyzaOikawa <[data deleted]>"

USER root

COPY overlay /
RUN mkdir -p /srv/pypicache/logs/ && \
    mkdir -p /etc/nginx/sites-enabled && \
    ln -s /etc/nginx/sites-available/default /etc/nginx/sites-enabled/default

# forward request and error logs to docker log collector

RUN ln -sf /dev/stdout /srv/pypicache/logs/access.log && \
    ln -sf /dev/stderr /srv/pypicache/logs/error.log

STOPSIGNAL SIGTERM

CMD ["nginx", "-g", "daemon off;"]
在准备好上述文件之后,则只需要以下几步~
# 构建 Docker 镜像
sudo docker build -t pip-cache ./
# 运行服务
sudo docker run -d \
     -p 443:443 \
     --mount source=pypicache,target=/srv/pypicache/data \
     --name pypicache \
     pip-cache
这里是默认使用了 443 端口,如果 443 端口已经被占用的话,那么可以将前一个 443 改为其他可用的端口即可~
最后就可以正常使用了~比如这个服务跑在 10.0.1.233 上,域名为 pypi.cocoaneko.moe,端口为 233,那么用户在 pip 安装的时候,则可以先确定自己电脑上的 /etc/hosts 已经包含了
10.0.1.233 pypi.cocoaneko.moe
然后 pip 安装 tensorflow-gpu 的命令则为
pip3 install -i https://pypi.cocoaneko.moe:233/simple tensorflow-gpu
当然,每一个包的某一个版本第一次被请求时,还是会走外网,但是在之后的安装中则会走高速缓存,这时下载起来就会飞快了~

最后,如果是用 Docker Compose 部署的话,目录组织可以是
.
|-- docker-compose.yml               # 用于 Docker Compose
|-- ...                              # 其他文件
`-- pip-cache                        # *PyPi 高速缓存服务
    |-- Dockerfile                   # 用于 Docker 构建
    |-- overlay
        |-- cert                     # SSL 证书
        |   |-- pypi.crt             # SSL certificate, full chain
        |   `-- pypi.key             # SSL 私钥
        `-- etc
            `-- nginx                # nginx 配置目录
                |-- nginx.conf       # nginx 全局设置
                `-- sites-available
                    `-- default      # 我们构建的镜像服务的设置
然后在 docker-compose.yml 中写好对应的 service 即可~以 jupyter-docker-delpoy 的一个片段为例子~下面高亮的则是增加的部分~
# Copyright (c) Jupyter Development Team.
# Distributed under the terms of the Modified BSD License.

# JupyterHub docker-compose configuration file
version: "3"

services:
  pip-cache:
    build:
      context: pip-cache
      container_name: pypicache
      restart: always
      volumes:
        - "pypicache:/srv/pypicache/data"
      ports:
        - "233:443/tcp"
  hub:
    depends_on:
      - hub-db
      - pip-cache
    links:
      - hub-db
      - pip-cache
    build:
      context: .
      dockerfile: Dockerfile.jupyterhub
      args:
        JUPYTERHUB_VERSION: ${JUPYTERHUB_VERSION}
    restart: always
    image: jupyterhub

...# 中间省略

volumes:
  data:
    external:
      name: ${DATA_VOLUME_HOST}
  db:
    external:
      name: ${DB_VOLUME_HOST}
  pip-cache:
    external:
      name: pypicache

networks:
  default:
    external:
      name: ${DOCKER_NETWORK_NAME}
因为我们将 pip-cache 服务的 container_name 设置为了 pypicache,因此现在可以在构建单用户镜像时增加 /etc/hosts
pypicache pypi.cocoaneko.moe
