As many of macOS users have already enabled TouchID for sudo by adding the line below to /etc/pam.d/sudo.
auth sufficient pam_tid.so

That's convenient, however, not interesting at all. Let's do something amusing! What about granting root privilege by winning the floppy bird game! Play the game that sets you free \(≧▽≦)/ Σ(・□・;)
This post will roughly be divided into 3 parts,
- Get the original
sudoproject compiled successfully - Add the
floppy birdgame tosudo - Test and replace the
sudowhich ships with macOS tosudo-floppy
1. Get the original sudo project compiled successfully
The very first thing is to fetch the latest source code of sudo on https://opensource.apple.com/tarballs/sudo/. At the time of writing, the latest release is https://opensource.apple.com/tarballs/sudo/sudo-86.50.1.tar.gz. Open the sudo.xcodeproj in Xcode after downloading and unzipping the tarball and we can start!
At the moment, it won't compile successfully. Because Apple use their own macosx.internal, which we obviously don't have, as base SDK. Thus we have to change all targets' base SDK from macosx.internal to macOS.

If you give it a shot now, you will still get an error, 'libutil.h' file not found.

But please don't panic. The corresponding file is located at https://opensource.apple.com/source/libutil. Remember to download (or just copy and paste the code in your browser) the latest one. For this post, https://opensource.apple.com/source/libutil/libutil-51.200.4/libutil.h will be used.
Create a new header file which should be named libutil.h with Xcode, and save it at sudo/include/. Next step is to replace the automatically generated content in libutil.h to the code in https://opensource.apple.com/source/libutil/libutil-51.200.4/libutil.h. Now the whole project can be compiled successfully!

2. Add the floppy bird game to sudo
Indeed, we can write the floppy bird game from the beginning by ourselves, but that's really time consuming and off topic in some extent. Thus I found a lovely and high quality floppy bird game on the GitHub, https://github.com/aukeman/floppy_term. Let's give all credits and massive thanks to aukeman! (=゚ω゚)ノ
The project floppy_term is so fabulous, well organised and also compact. It would be much easier for us to adapt the game into sudo, since there is only 1 source file in floppy_term. You may either download the https://github.com/aukeman/floppy_term/floppy_term.c or open and leave it in browser for reference.
To add authorisation method, Source/sudoers/auth/sudo_auth.c should be modified.

As we can see that, there are 4 header files included in floppy_term.c, and 2 of them were already included in sudo_auth.c. So we just need to include the other 2 header files in sudo_auth.c.
#include <curses.h>
// #include <unistd.h> - already included
#include <sys/time.h>
// #include <string.h> - already included
And given that floppy_term uses ncurses, so libncurses should be linked to sudo. This can be done in the Build Phases section of sudo.

The entries array is defined right below the #include <...> part.
static sudo_auth auth_switch[] = {
/* Standalone entries first */
#ifdef HAVE_AIXAUTH
    AUTH_ENTRY("aixauth", FLAG_STANDALONE, sudo_aix_init, NULL, sudo_aix_verify, sudo_aix_cleanup, NULL, NULL)
#endif
#ifdef HAVE_PAM
    AUTH_ENTRY("pam", FLAG_STANDALONE, sudo_pam_init, NULL, sudo_pam_verify, sudo_pam_cleanup, sudo_pam_begin_session, sudo_pam_end_session)
#endif
// ...
}
The AUTH_ENTRY macro is defined in sudo_auth.h, and its comment reveals the usage of the 8 fields respectively.
/* Fields: name, flags, init, setup, verify, cleanup, begin_sess, end_sess */
#define AUTH_ENTRY(n, f, i, s, v, c, b, e) \
    { (f), AUTH_FAILURE, (n), NULL, (i), (s), (v), (c) , (b), (e) },
It can be inferred that, a typical authorisation method could include initialisation, setup, verification, cleanup functions, along with callbacks for session beginning and ending.
The compactness of floppy_term makes it quite straightforward. The entry of floppybird authorisation method only needs its name, the standalone flag and a verification function.
int floppybird_verify(struct passwd *pw, char *pass, sudo_auth *auth, struct sudo_conv_callback *callback);

static sudo_auth auth_switch[] = {
/* Play the game that sets you free */
    AUTH_ENTRY("floppybird", FLAG_STANDALONE, NULL, NULL, floppybird_verify, NULL, NULL, NULL)
// ...
}
After adding the entry for our floppybird, literally copy everything from line 6 in floppy_term.c, then paste them at the end of sudo_auth.c.
Of course, the original main() function in floppy_term.c will be our floppybird_verify() function. This would requires certain changes. The first thing is the name, from main() to floppybird_verify(), as shown in the screenshot below.

Another modification is the return value. Because it tells sudo whether the user passes the verification or not. And in our plan, a user can gain root privilege if they win enough scores. To implement this feature, the game state needs to be tracked. However, the original floppy_term only defined 3 states, TITLE_SCREEN, PLAY and BOOM. Hence a new state that denotes a user passed the game is added.
enum game_state_e {
    TITLE_SCREEN,
    PLAY,
    BOOM,
    // we need to track whether a user passed the game or not
    PASSED,
};
To demonstrate, let's say a user will win the game, if they managed to let the bird fly through 3 (you may change this to any other number you like) barriers. Therefore, the scores will be checked every time we update the game screen.
case PLAY:
    // let's say a user will win the game
    // if they managed to let the bird fly through 3 barriers
    if ( score.current >= 3 ) {
        // set game state to PASSED
        game_state = PASSED;
        // and break from the switch
        break;
    }
    // ...
As for case BOOM:, AUTH_FAILURE should be returned to sudo.
case BOOM:

    if ( boom( particles,
              number_of_particles,
              pipes,
              number_of_pipes,
              &game_physics,
              &score ) ){
        game_state = TITLE_SCREEN;

    // tell ncurses to close the window
        endwin();

        // tell sudo that the authorisation failed
        // because the bird went boom boom boom
        return AUTH_FAILURE;
    }
Now we're nearly finished part 2. Only add a simple if statement outside the switch to check the game state.
// if user passed the game
if (game_state == PASSED) {
    // tell ncurses to close the window
    endwin();

    // and tell sudo the user has been successfully verified
    return AUTH_SUCCESS;
}
And one more thing, don't forget to return AUTH_FATAL on other situations. This return statement should be exactly the last line of floppybird_verify(). Because we only return AUTH_SUCCESS if the score exceeds 3, and return AUTH_FAILTURE if the bird crashed into barrier.
// tell sudo that the authorisation ended
// because user quitted the game
return AUTH_FATAL;
3. Test and replace the sudo which ships with macOS to sudo-floppy
After finishing part 2, the rest of our work is to test our compiled sudo. However, sudo needs some special file permission.
Step 1, You may right click on Products/sudo in the Project Navigator, and choose Show in Finder.

Step 2, open Terminal and then type
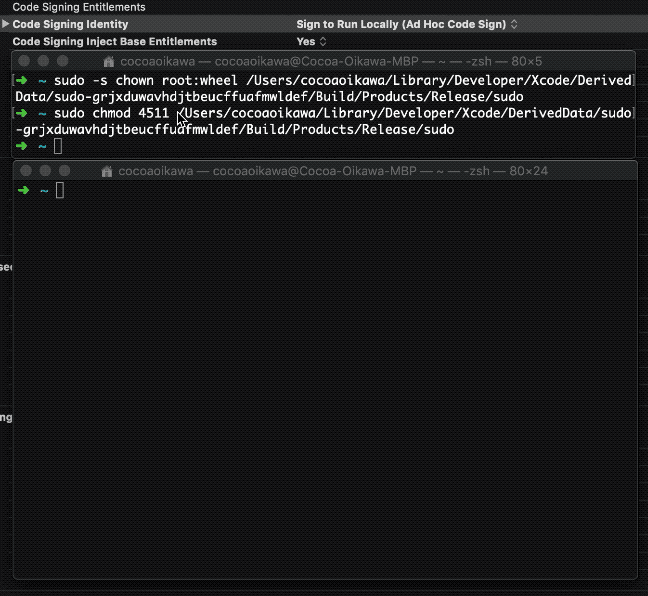
sudo -s chown root:wheel /PATH/TO/YOUR/sudo
sudo chmod 4511 /PATH/TO/YOUR/sudo
/PATH/TO/YOUR/sudo should be substituted with the path of sudo in step 1.
Step 3, gain root privilege by winning the game!
/PATH/TO/YOUR/sudo -i
Unfortunately, Apple added an entitlement file for signature since sudo-83.
<?xml version="1.0" encoding="UTF-8"?>
<!DOCTYPE plist PUBLIC "-//Apple//DTD PLIST 1.0//EN" "http://www.apple.com/DTDs/PropertyList-1.0.dtd">
<plist version="1.0">
<dict>
    <key>com.apple.private.AuthorizationServices</key>
    <array>
        <string>com.apple.security.sudo</string>
    </array>
</dict>
</plist>
Obviously, this is a private entitlement. Therefore when attaching the entitlement to binary, it has to be signed by Apple. I'm neither working in Apple nor I have Apple's code signing certificates. Thus I got something like
[1] 23333 killed: -i

The solution, in contrast, is fortunately simple. Just search Signing in Build Settings, and then empty the Code Signing Entitlements option.
Before recompiling, make sure to delete the old compiled one. Because we have assigned it to root user and set the file permission as 4511.
sudo rm /PATH/TO/YOUR/sudo
Now with compiled sudo, let's redo step 2. Set its owner and group to root:wheel, and set file permission as 4511.
sudo -s chown root:wheel /PATH/TO/YOUR/sudo
sudo chmod 4511 /PATH/TO/YOUR/sudo
And it's time to enjoy your game now!