Category Archives: Rust Learning

NextDest

NextDest allows your device that has a public IPv6 address to be automatically registered and updated its DNS record.

With more and more ISPs offering public IPv6 addresses to their users, we can directly access our devices that have a public IPv6 address. But the public IPv6 address of your device can change from time to time and it's extremely hard to memorise an IPv6 address. 

Therefore we have DNS, a solution from a long time ago. Yet it's also boring and painful if we have to set the DNS record by hand.

That's why I wrote NextDest. The client-side detects the public IPv6 address on your device (by sending a request to the server-side, so everything is in your hand). Once it finds any available public IPv6 address, it will send a registration request to the server-side along with predefined device name (so that the server-side can decide which domain name should be updated). If everything works, the client-side will display the latest DNS record and the public IPv6 address of your device.

However, this is NOT the end of the story. If NextDest exposes your public IPv6 address to the Internet, your device could be attacked. 

So NextDest supports 4 modes:

1. direct mode

Internet <-> Endpoint

The real IPv6 on that device will be used for DNS resolving. 

All ports can be accessed from the Internet.

2. proxy mode

Internet <-> nextdest <-> Endpoint

An available IP will be used from your IP pool (defined in CIDR format, in the server-side config file).

Cloudflare (or other) only acts like a DNS, i.e, the real IP will show up in DNS record.

Network traffic is forwarded by NextDest.

Only ports defined in ports (in the server-side config file) can be accessed from the Internet.

3. cdn mode

Internet <-> Cloudflare <-> Endpoint

The real IPv6 on that device will be only used for DNS zone settings

All network traffic will be proxied by Cloudflare (or any equivalent), i.e, only CDN's IP will show up in DNS record.

Only 80 or 443 or other CDN provider allowed ports can be accessed from the Internet.

4. hybrid mode

It is the combination of proxy mode and cdn mode.

Project code

NextDest server-side source code: https://goth lab.com/ryza-cocoa/nextdest-server

NextDest client-side server code: https://gitlab.com/ryza-cocoa/nextdest
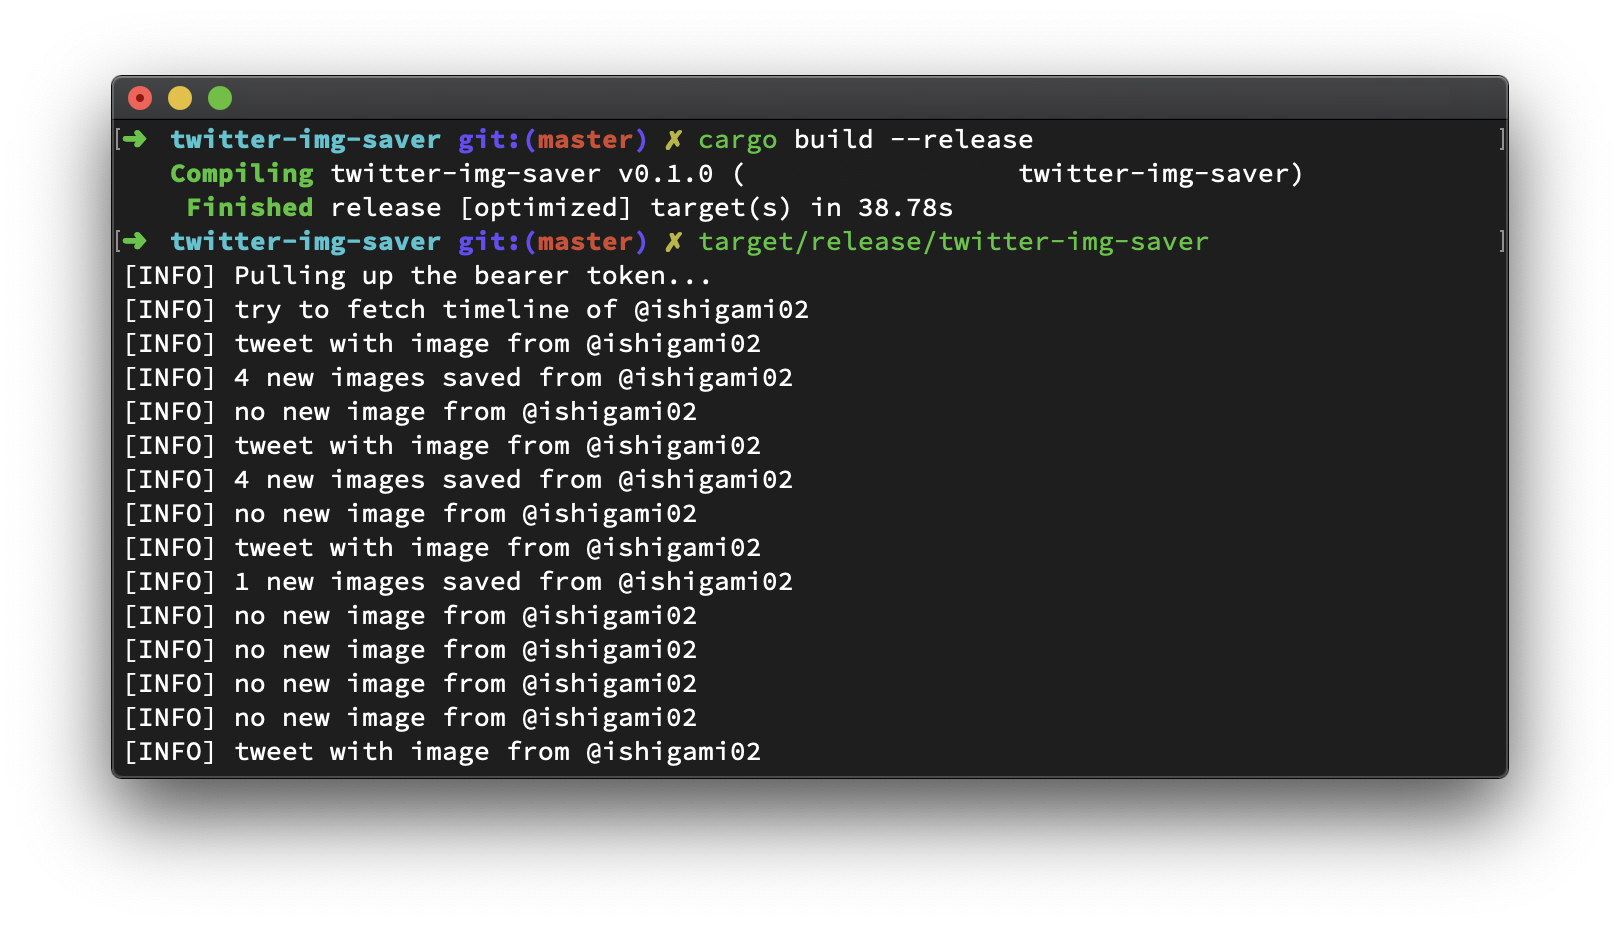
Rust Learning from Zero (26) —— Save Twitter Images

I followed a few Twitter accounts that post yuri photos, and I saved some of these images when I saw them. 女の子になりたい!

However, it would be better if there is a bot that could do all this for me. And of course, applying for a Twitter developer account is a must. When your developer account is ready, you will need to generate a consumer key & secret pair.

This program will be really simple and straightforward. It reads from a config file that contains the consumer key & secret pair, as well as a list of usernames you interested in, and the path to the directory where you'd like to save images. A sample of the config file is shown below.

{
  "key": "KEYKEYKEYKEYKEYKEYKEYKEY",
  "secret": "SECRETSECRETSECRETSECRET",
  "img_dir": "imgs",
  "users": [
    "username1",
    "username2",
    "username3"
  ]
}

Substitute your own consumer key & secret, and then list some users you interested in in the users array.

Also, I don't want the program to be too complex, so I decide to not use any database. If you want to add more users to the list while the program is running, then just add them into the JSON file and save it. The program will try to reload the user list before the next round of polling data.

And this program is on OwO now! https://owo.ryza.moe/. You can download and install it on Linux with only one line command. (For more details about OwO, you can refer to this post, Rust Learning from Zero (23) —— The OwO software distribution system!)

bash <(curl -sSLf https://owo.ryza.moe/twitter-img-saver/install.sh)
Continue reading Rust Learning from Zero (26) —— Save Twitter Images

Rust Learning from Zero (25) —— Handle Continuous Features in Decision Tree with Rust

This post has two main purposes, 1) serves as personal notes for handling continuous features in decision tree; 2) try to use trait to add more computation operations to vectors, because the original Vec shipped with Rust is nowhere near the numpy in Python when it comes to scientific computation. (Though I know that Vec may not be designed to do handle such task.)

There are many ways to handle continuous descriptive features, such as discretions. This post will exploit weighted variance as a measurement for splitting continuous feature at a node.

The weighted variance is computed by the following equation, where $n$ is the number of rows in the data, $\mathcal{L}$ is the set of all unique labels, $D$ is the column with continuous features ($n$ rows), $p^*$ denotes the best split position in $D$.

$p^*=argmin_{p\in [1, n)} \sum_{l\in \mathcal{L}}\frac{\|\mathcal{L}_{i=l}\|}{\|\mathcal{L}\|} [var(D_{[0, p)}, \mathcal{L}_{i=l}) + var(D_{[p, n)}, \mathcal{L}_{i=l})]$

Once the algorithm decides the best split position of $D$, we can apply divide and conquer! For example, if $p^*$ has been computed, then we recursively apply this mechanism to both $D[0 .. p^*]$ and $D[p^* ..]$. When the split position arrays, $S_i$ and $S_j$, of $D[0 .. p^*]$ and $D[p^* ..]$ return, $S_i$ and $S_j$ will be merged and sorted as final value.

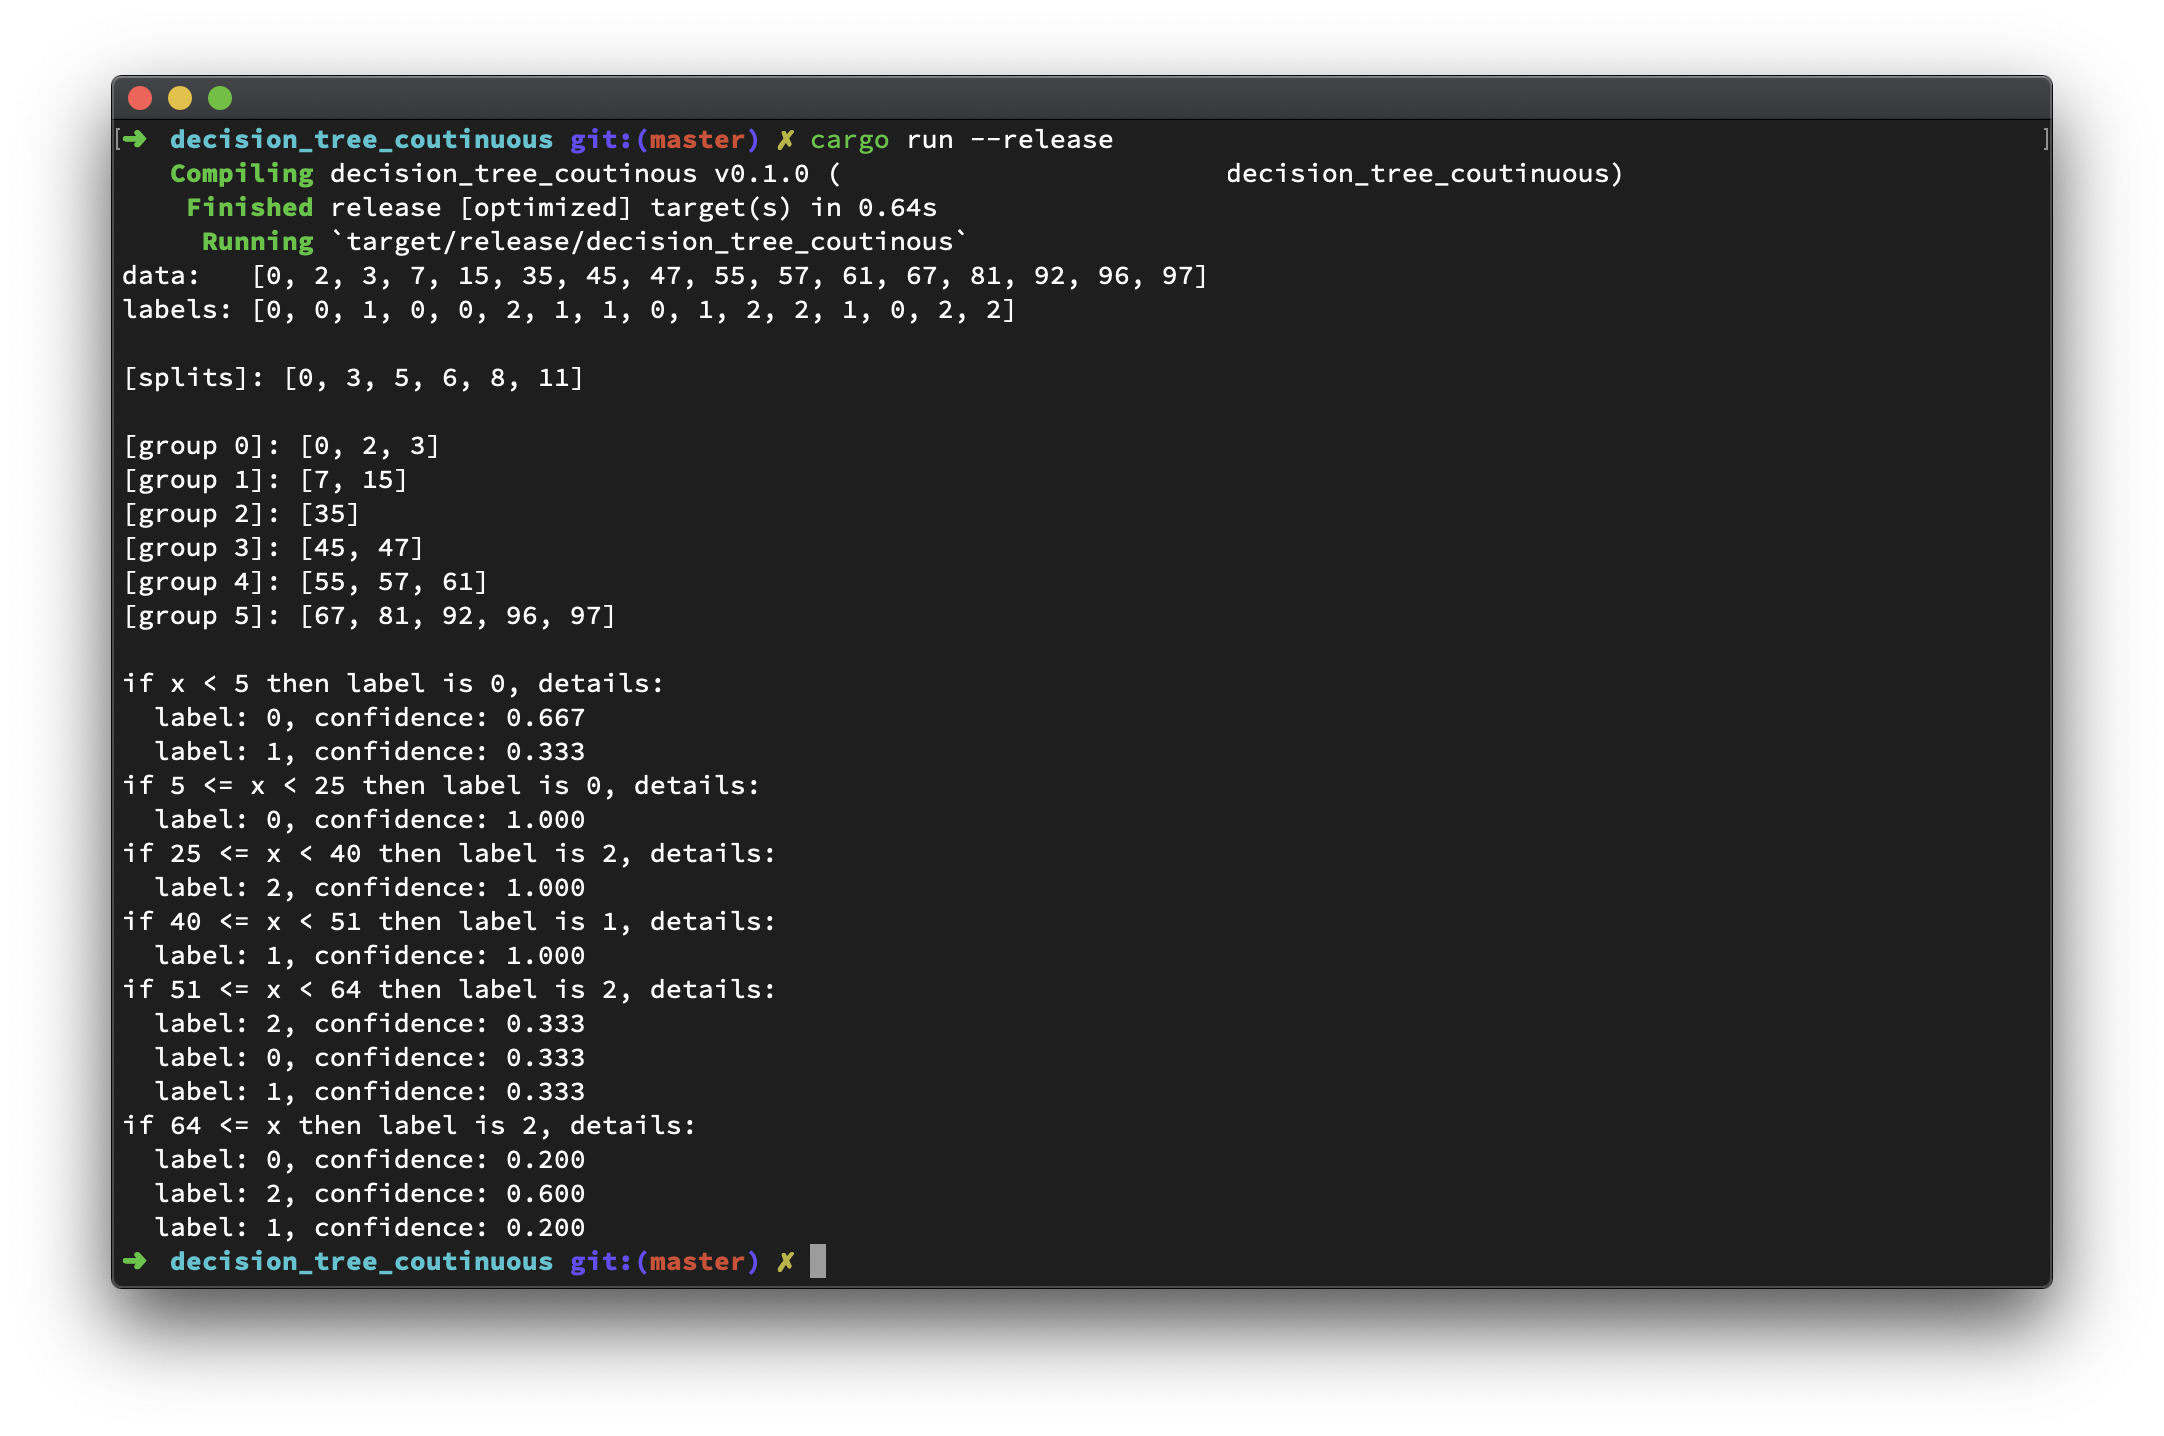
Let's try this algorithm on this small dataset,

Continuous DataLabel
00
20
31
70
150
352
451
471
550
571
612
672
811
920
962
972

Looks good to me! And code goes below.

Continue reading Rust Learning from Zero (25) —— Handle Continuous Features in Decision Tree with Rust

Rust Learning from Zero (24) —— Travelling Salesperson Problem using Evolutionary Approach with Rust

I believe that for almost anyone studying in computer science would know this famous problem below.

The travelling salesperson problem asks the following question: "Given a list of cities and the distances between each pair of cities, what is the shortest possible route that visits each city exactly once and returns to the origin city?" Wikipedia

I know that there are thousands if not millions approaches that we can use to solve this problem. But just for personal notes and demonstration, I will solve TSP using one evolutionary approach with Rust.

The idea of today's evolutionary approach (EA) is rather simple:

  1. Randomly initialise some solutions and compute cost (described as fitness in EA) respectively.
  2. Mutate one of them, compute the fitness of mutated solution. If the new fitness is worser than the last one, go step 3. Otherwise go step 4.
  3. Reject this mutation and go step 2.
  4. Accept it as a solution, discard the worst solution and repeat step 2.

For $n$ nodes in a path, there are maximum $n!$ (actually, $(n-1)!$) paths to select from. Therefore, if what we want if the global optimal, then this algorithm has to iterate all possible paths, and that gives us $O(n!)$ performance. However, EA could actually gives us a quite good suboptimal in much less time because of the way it works. One use case of EA is when we only have limited time, computation performance and we can accept suboptimal as a solution.

For example, if we have the following adjacency matrix in TSP,

ABCDE
A57415
B53410
C7327
D4429
E151079

Then we solve this problem with EA, the output could be as below.

Initial solution [0]: fitness => 33, seq => CABED
Initial solution [1]: fitness => 32, seq => CADBE
Initial solution [2]: fitness => 34, seq => CDEAB
Initial solution [3]: fitness => 32, seq => ABDEC
Initial solution [4]: fitness => 33, seq => ADEBC
[0] Reject mutation: fitness => 38, seq => DBEAC
[1] Reject mutation: fitness => 34, seq => CDAEB
[2] Accept mutation: fitness => 33, seq => CEADB
[2] Worst solution dropped: fitness => 34
[3] Accept mutation: fitness => 28, seq => EDABC
[3] Worst solution dropped: fitness => 33
[4] Reject mutation: fitness => 33, seq => CBDAE
[5] Reject mutation: fitness => 38, seq => ACDBE
Best solution so far: fitness => 28, seq => EDABC

As you can see, EA found quite a good solution with fitness 28, which is EDABC. Also, this is in fact the global optimal and EA actually found the global optimal in the 3rd mutation!

Continue reading Rust Learning from Zero (24) —— Travelling Salesperson Problem using Evolutionary Approach with Rust

Rust Learning from Zero (23) —— The OwO software distribution system!

Although I've written a SSL management and distribution system, rcert, but the here immediately goes another problem: I still need to manually deploy the rcert, which is kind of frustrating. Or I can write some shell scripts to make this process automatically. Let's solve this (possibly) once and for all.

I built a handy (perhaps also buggy) software distribution system this time. This main purpose is of course to ease out the deployment process. And I'd like to call it OwO, because this emoji looks so nice and cool. Moreover, it should be able to deploy itself once I have the initial instance ran.

Basically, it will serve these pages and API endpoints below (let's take owo.ryza.moe as its domain)

URLCategoryAuthNotes
Homehttps://owo.ryza.moe/WebpageNo
Admin https://owo.ryza.moe/adminWebpageYesadmin is customisable
Sign Inhttps://owo.ryza.moe/signinWebpage APINo
Sign Outhttps://owo.ryza.moe/signoutWebpage APINo
Compile-time Static Fileshttps://owo.ryza.moe/static/{filename}Web ResourcesYesThese files are compiled into the final binary
Feature Imagehttps://owo.ryza.moe/feature_img/{img}Web ResourcesNoFeature Image for Specific Project
Install Scripthttps://owo.ryza.moe/{name}/install.shWeb ResourcesNoInstall Script for Specific Project
Project Resourceshttps://owo.ryza.moe/{name}/resources/{resource_name}Web ResourcesNoResources for Specific Project
Update Project Infohttps://owo.ryza.moe/update-dist-infoAPI EndpointYesPost
Upload Project Resourcehttps://owo.ryza.moe/upload-dist-resourceAPI EndpointYesPost, one file per request
Get Raw Install Scripthttps://owo.ryza.moe/raw-scriptAPI EndpointYesGet
Remove Project for Versionhttps://owo.ryza.moe/remove-distAPI EndpointYesPost
Remove Project Resourcehttps://owo.ryza.moe/remove-dist-resourceAPI EndpointYesPost

Once I had decided these rules, the next question was which http server crate should I use. I considered hyper, but let's try something else this time. Thus OwO uses actix_web as its http server framework.

Apparently, OwO will output dynamic webpages, so it needs an HTML template engine. After some googling, I chose ructe as the template engine to render dynamic webpages for OwO.

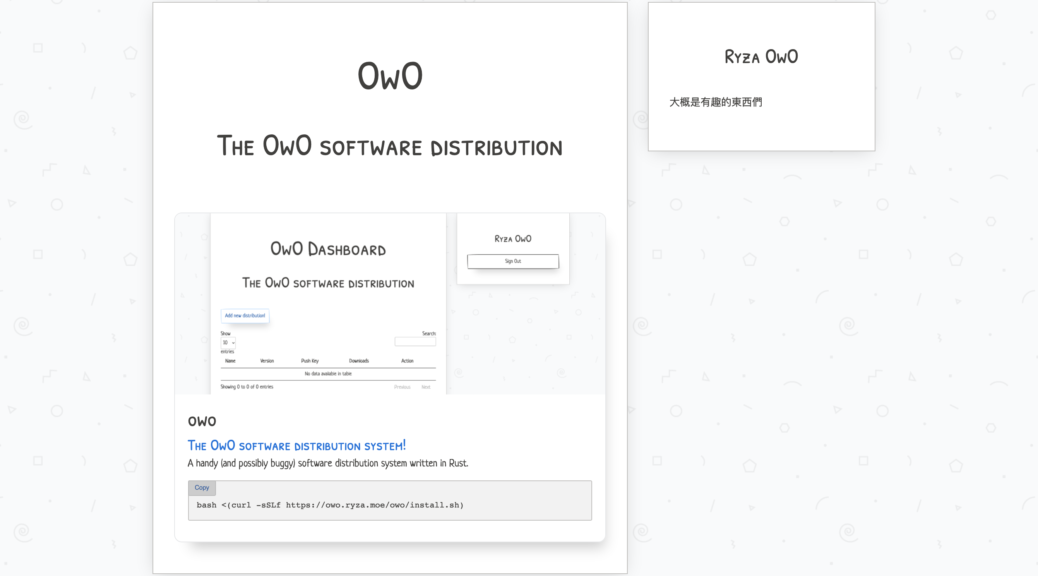
And here is the result of 3 days' coding!

You can visit the live instance of my OwO at https://owo.ryza.moe. And the code goes here: https://magic.ryza.moe/ryza/owo

Rust Learning from Zero (22) —— SSL certificates management and distribution with Rust

Screenshot of rcert

Last night, I was planning to do some web development, and when I created my new VPS, I just felt like it was quite a tedious process either manually copying-pasting SSL certs around or deploying CertBot to allocate new ones for me. My life would be easier if there is some sort of SSL certificates management and distribution system.

Although I didn't really search these keywords on Google, I can promise that they definitely exist on the web. Nevertheless, I want to write one myself, because it has been such a long period since last time I wrote something in Rust.

Continue reading Rust Learning from Zero (22) —— SSL certificates management and distribution with Rust

Rust Learning from Zero (21) —— All I need is a dlsym | Exploit macOS application with Rust

It has been a long time since my last reverse engineering on macOS, and that was about Netease Cloud Music. 

But I always write that in Objective-C, perhaps I should try something different, let's say, Rust.

  1. Compile a .dylib that macOS recognises
  2. Build a Constructor Function that Invokes on dylib Loading
  3. All I need is a dlsym
    1. Find the Symbol You Want
    2. Casting to Function Pointer
  4. Compile and Hook

1. Compile a .dylib that macOS recognises

The first step is to tell cargo that what we need is a library

cargo new --lib exploit

And cargo will create these files for us.

exploit
├── Cargo.toml
└── src
    └── lib.rs

However, if we compile this project, the output library has a suffix .rlib. which suggests that this is a Rust library. Yet we need a dylib that macOS recognises.

Therefore the hint for producing a .dylib library should be added in Cargo.toml, which is shown below.

[lib]
crate-type = ["dylib"]

This tells cargo out crate type is a dylib, which satisfies the format requirements of macOS dynamic library.

Continue reading Rust Learning from Zero (21) —— All I need is a dlsym | Exploit macOS application with Rust

WebP Server in Rust

Generate WebP images for JPG / PNG files on-the-fly with Rust! webp_server_rs

Speaking of switching to WebP image, at the first glance, I just did it in a very naive approach.

Then @Nova wrote a Node.JS server that can serve JPG/PNGs as WebP format on-the-fly. You can find that at n0vad3v/webp_server.

A few days ago, @Nova and @Benny rewrite the WebP Server in Golang, webp-sh/webp_server_go

And that looks really promising, the size of the webp server, according to its description, had greatly reduced from 43 MB to 15 MB, and it is a single binary instead of webp_server with node_modules.

I cloned that project and added a tiny feature. However, I just found that although it is absolutely easy to implement the tiny feature, there is a potential design issue with the `fasthttp` module. In order to get everything work, it took me about 4 hours to debug on it.

Finally, it turned out to be a pointer of an internal variable (ctx.Request.uri, or so) was directly returned from ctx.Path(), and if users invoke ctx.SendFile(filepath), the ctx.Request.uri will be set to filepath, which will also propagate to all variables that hold the shared value of ctx.Path(). You may visit my previous blog post for details.

Well, in aforementioned blog post, I said that it would be better if it was written in Rust. Now, let's make it come true and push the WebP server even further.

There are some comparisons among n0vad3v/webp_server, webp-sh/webp_server_go and webp_server_rs.

As for size,

  • webp_server(nodejs) with node_modules takes 43 MB
  • webp-server(go) has reduced to 15 MB, and it's single binary
  • webp-server(Rust) pushes that even further, only 3.6 MB on macOS and 6.4 MB on Linux

In terms of convenience, you can just download the binary file and run if you choose either webp-server(go) or webp-server(Rust). However, webp_server(nodejs) requires pm2 to run.

Performance, to be honest, I haven't got time to run some benchmarks on them. But IMHO it (webp-server(Rust)) should be as fast as golang version.

从零开始的 Rust 学习笔记(19) —— Rewrite insert_dylib in Rust

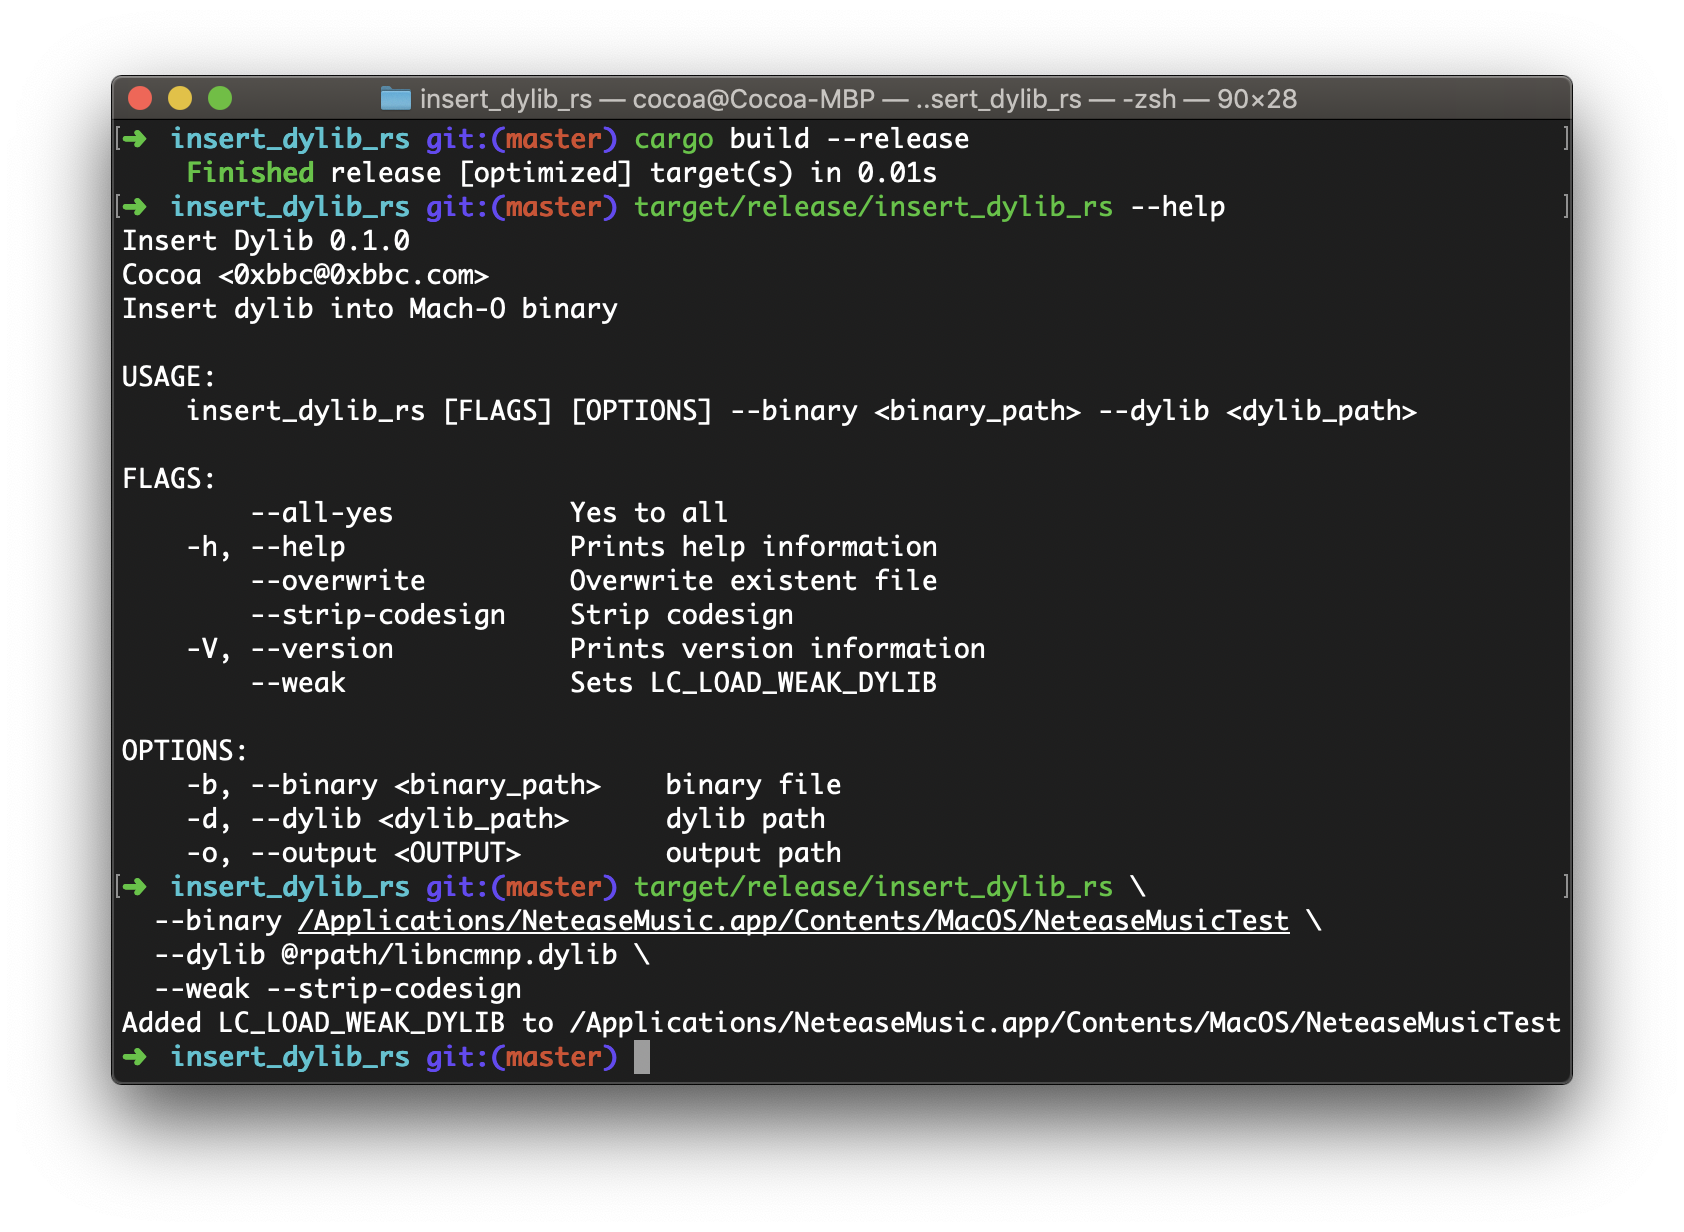
最近鹹魚了蠻長一段時間,發現大約有一個多月沒有寫這個系列了,今天繼續學習 Rust 好啦!雖然有在看「The Rust Programming Language」,但是還是得寫寫的~想了一會兒之後,決定把在「另一种方法获取 macOS 网易云音乐的正在播放」裡用過的 insert_dylib 用 Rust 重寫一下(^O^)/

insert_dylib 本身來說並不複雜,但因為不像 C/C++/Objective-C 裡那樣可以直接 #import <mach-o/loader.h> 等,於是 MachO 的一些 struct 就需要自己在 Rust 中重寫一遍~

當然,實際上也可以用 Rust 寫個 Parser,然後去 parse 這些 header 文件,並且自動生成 Rust 的 struct。可是我太懶了,留到下次試試看好啦(咕咕咕) 這次的就放在 GitHub 上了,insert_dylib_rs

不過需要注意的就是有個 BigEndian 和 LittleEndian 的問題,不同的 MachO 使用的可能不一樣,因此就增加了一個 swap_bytes! 的 macro 和一個 FixMachOStructEndian 的 trait

src/macho/macho.rs 裡隨機選一個 struct 出來展示的話,大約就是如下這樣子

use super::prelude::*;

macro_rules! swap_bytes {
    ($self:ident, $field_name:ident) => {
        $self.$field_name = $self.$field_name.swap_bytes();
    };
}

pub trait FixMachOStructEndian {
    fn fix_endian(&mut self);
}

#[derive(Debug)]
pub struct SymtabCommand {
    pub cmd: u32,
    pub cmdsize: u32,
    pub symoff: u32,
    pub nsyms: u32,
    pub stroff: u32,
    pub strsize: u32,
}

impl SymtabCommand {
    pub fn from(buffer: [u8; 24], is_little_endian: bool) -> SymtabCommand {
        let sc_buffer: [u32; 6] =
            unsafe { std::mem::transmute_copy::<[u8; 24], [u32; 6]>(&buffer) };
        let mut symtab_command = SymtabCommand {
            cmd: sc_buffer[0],
            cmdsize: sc_buffer[1],
            symoff: sc_buffer[2],
            nsyms: sc_buffer[3],
            stroff: sc_buffer[4],
            strsize: sc_buffer[5],
        };

        if is_little_endian {
            symtab_command.fix_endian();
        }

        symtab_command
    }

    pub fn to_u8(&self) -> [u8; 24] {
        let mut data: [u32; 6] = [0u32; 6];
        data[0] = self.cmd;
        data[1] = self.cmdsize;
        data[2] = self.symoff;
        data[3] = self.nsyms;
        data[4] = self.stroff;
        data[5] = self.strsize;

        unsafe { std::mem::transmute_copy::<[u32; 6], [u8; 24]>(&data) }
    }
}

impl FixMachOStructEndian for SymtabCommand {
    fn fix_endian(&mut self) {
        swap_bytes!(self, cmd);
        swap_bytes!(self, cmdsize);
        swap_bytes!(self, symoff);
        swap_bytes!(self, nsyms);
        swap_bytes!(self, stroff);
        swap_bytes!(self, strsize);
    }
}
Continue reading 从零开始的 Rust 学习笔记(19) —— Rewrite insert_dylib in Rust

从零开始的 Rust 学习笔记(18) —— Rust Script Runner

Rust 并不能像 Python 那样有全局的 Package(当然,现在就算是写 Python,也很少有谁一上来就往全局环境里安装 Package 了),于是 Rust 要想单独运行一个引用了第三方库的 Rust script 时,就必须用 Cargo 创建一个 project。

绝大多数时候这个倒也是能接受啦,但是有时真的只是想在一边测试一个小的 function 或者验证一下自己的想法。如果直接在 working-in-progress 的 project 里写的话,就可能

  1. 不得不配合已有的部分做一些 error handling
  2. 或者手工测试到该条代码路径上
  3. 又或者写上相应的 unit test

显然只是想快速验证一下的话,上面三种方式都有不便之处。如果单独再用 cargo new 一个 project 的话,也不是不行,但是懒(

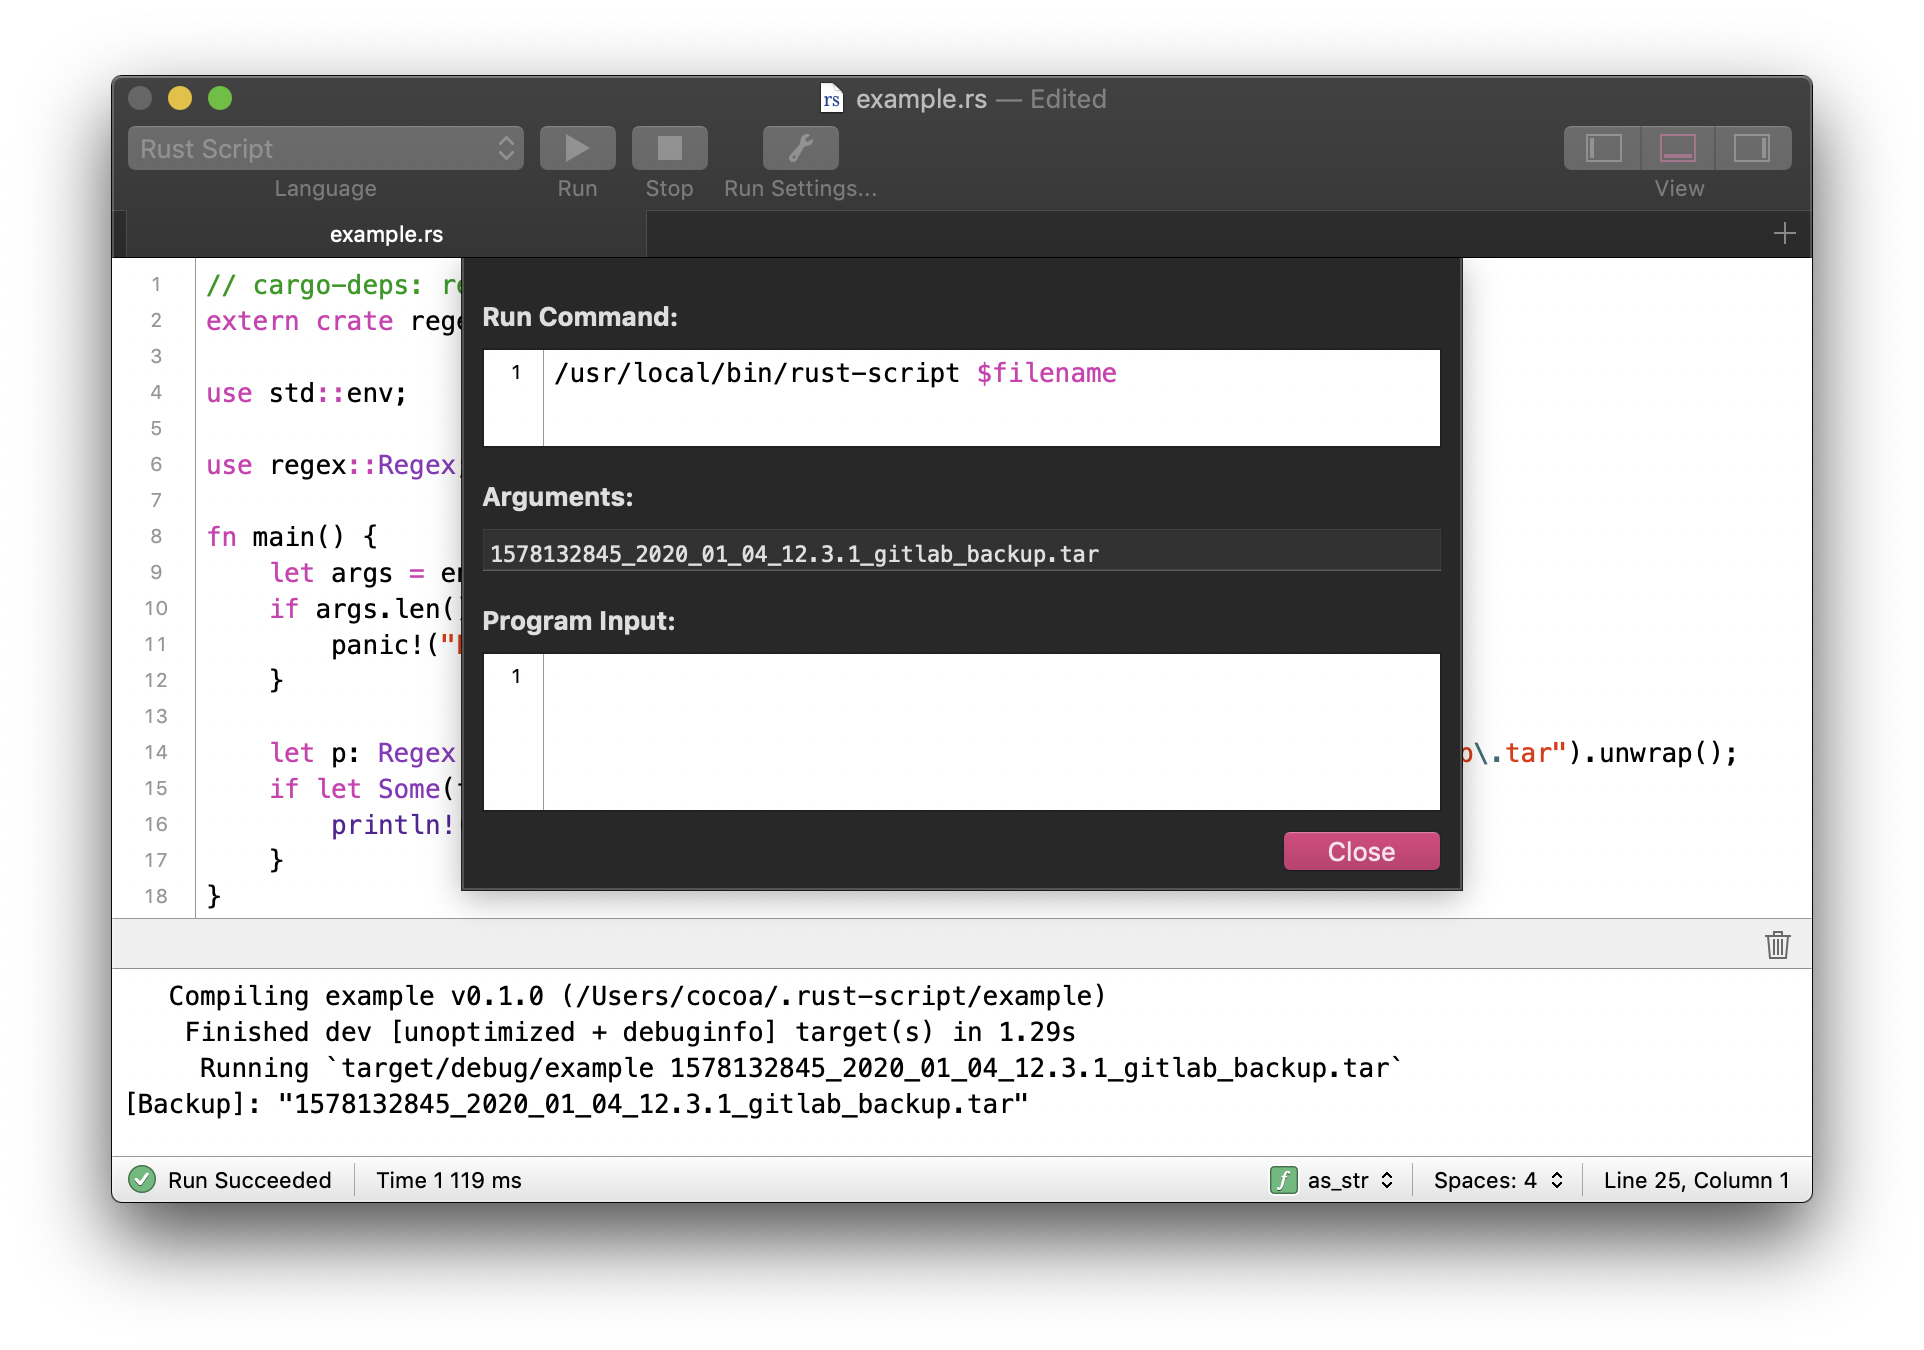
在用 Code Runner(对你来说也许是 VSCode 之类的)的时候,直接新建一个 Rust file 开始写会相对方便。假如我们的 Rust script 叫 example.rs,那么要引入第三方 crate 的话,比如引用 regex,我们可以用这样的语法,

// cargo-deps: regex="1"

如果要控制 crate 的 feature 之类的,则可以写

// cargo-deps: opencv = {version = "0.28", default-features = false, features = ["opencv-41", "contrib"]}

虽然并不能实现 Python 那样的全局 package,但是我们可以用代码扫描 exmaple.rs 里面所有的 // cargo-deps: {:dependency},然后自动生成一个 example 目录和相应的 Cargo.toml 文件,接着将 example.rs 文件复制到 example/src/main.rs, 最后自动调用 cargo run

Continue reading 从零开始的 Rust 学习笔记(18) —— Rust Script Runner